Plain English Programming

Having programmed for many years in many languages, I often find myself thinking in English pseudo-code, then I translate my thoughts into whatever artificial syntax I’m working with at the time. So one day I thought, “Why not simply code at a natural language level and skip the translation step?” My elder son (also a programmer) and I talked it over, and we decided to test the theory. Specifically, we wanted to know:

1. Is it easier to program when you don’t have to translate your natural-language thoughts into an alternate syntax?

2. Can natural languages be parsed in a relatively “sloppy” manner (as humans apparently parse them) and still provide a stable enough environment for productive programming?

3. Can low-level programs (like compilers) be conveniently and efficiently written in high level languages (like English)?

And so we set about developing a Plain English compiler (in Plain English) in the interest of answering those questions. And we are happy to report that we can now answer each of those three questions, from direct experience, with a resounding, “Yes!”

The Theory

Our parser operates, we believe, something like the parsing centers in the human brain. Consider, for example, a father saying to his baby son…

“Want to suck on this bottle, little guy?”

…and the kid hears…

“blah, blah, SUCK, blah, blah, BOTTLE, blah, blah.”

…but he properly responds because he’s got a “picture” of a bottle in the right side of his head connected to the word “bottle” on the left side, and a pre-existing “skill” near the back of his neck connected to the term “suck.” In other words, the kid matches what he can with the pictures (types) and skills (routines) he’s accumulated, and simply disregards the rest. Our compiler does very much the same thing, with new pictures (types) and skills (routines) being defined — not by us, but — by the programmer, as he writes new application code.

The Practice

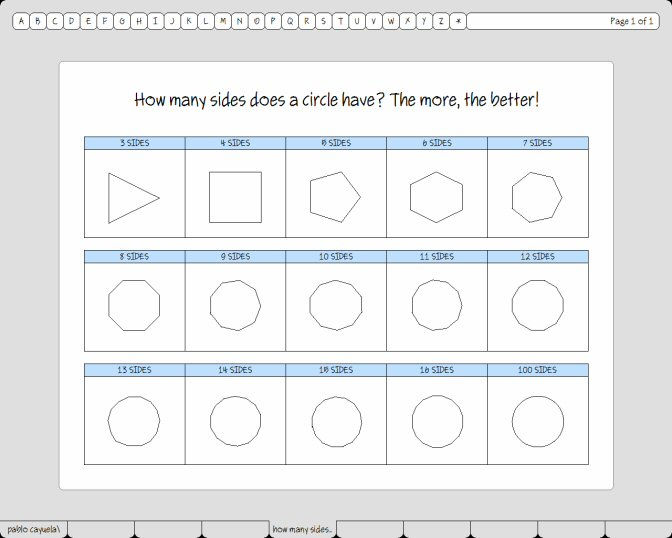
A typical type definition looks like this:

A polygon is a thing with some vertices.

Internally, the name “polygon” is now associated with a dynamically-allocated structure that contains a doubly-linked list of vertices. “Vertex” is defined elsewhere (before or after this definition) in a similar fashion; the plural is automatically understood.

A typical routine looks like this:

To append an x coord and a y coord to a polygon:
Create a vertex given the x and the y.
Append the vertex to the polygon’s vertices.

Note that formal names (proper nouns) are not required for parameters and variables. This, we believe, is a major insight. A real-world chair or table is never (in normal conversation) called “c” or “myTable” — we refer to such things simply as “the chair” or “the table”. Likewise here: “the vertex” and “the polygon” are the most natural names for these variables.

Note also that spaces are allowed in routine and variable names (like “x coord”). It’s surprising that all languages don’t support this feature; this is the 21st century, after all. Note also that “nicknames” are also allowed (such as “x” for “x coord”). And that possessives (“polygon’s vertices”) are used in a very natural way to reference fields within records.

Note, as well, that the word “given” could have been “using” or “with” or any other equivalent since our sloppy parsing focuses on the pictures (types) and skills (routines) needed for understanding, and ignores, as much as possible, the rest.

Like a Math Book

At the lowest level, things look like this:

To add a number to another number:
Intel $8B85080000008B008B9D0C0000000103.

Note that in this case we have both the highest and lowest of languages — English and machine code (in hexadecimal) — in a single sentence. The insight here is that a program should be written primarily in a natural language, with snippets of code in more appropriate syntax as (and only as) required. Like a typical math book: mostly natural language with formula snippets interspersed.

We hope someday the technology will be extended, at the high end, to include Plain Spanish, and Plain French, and Plain German, etc; and at the the low end to include “snippet parsers” for the most useful, domain-specific languages. Español Llano, thanks to our helper Pablo in Argentina, is now up and running.

An Objection Answered

Now perhaps you’re thinking natural language programming is a silly idea. But have you considered the fact that most of the code in most programs does simple stuff like “move this over there” and “show that on the screen” — things that can be most conveniently and most naturally expressed in a natural language? Let’s consider an example we can examine in detail:

Our compiler — a sophisticated Plain-English-to-Executable-Machine-Code translator — has 3,050 imperative sentences in it.

1,306 of those (about 42%) are conditional statements, and at least half of those are trivial things like these:

If the item is not found, break.
If the compiler’s abort flag is set, exit.

The remainder of those conditional statements are slightly more complex, but all of them fit on a single line (with our font, in our editor). Here are a couple of the longer ones:

If the length is 4, attach $FF32 to the fragment’s code; exit.
If the rider’s token is any numeric literal, compile the literal given the rider; exit.

Of the remaining sentences:

272 (about 9%) are simple assignment statements:

Put the type name into the field’s type name.

202 (about 7%) are just the infrastructure for various loops:

Loop.
Get a field from the type’s fields.
[ other stuff here]
Repeat.

183 (6%) simply add something to the end of this or that list, like so:

Add the field to the type’s fields.

164 (about 5%) are trivial statements used to return boolean results, start and stop various timers, show the program’s current status, and write interesting things to the compiler’s output listing.

Say no.
Say yes.
Set the variable’s compiled flag.
Start the compiler’s timer.
Stop the compiler’s timer.
Show status “Compiling…”.
List the globals in the compiler’s listing.

119 (about 4%) advance the focus in the source code, sentences like:

Bump the rider.
Move the rider (code rules).

92 (about 3%) are used to create, destroy and keep internal indexes up to date, sentences like:

Create the type index using 7919 for the bucket count.
Index the type given the type’s name.
Destroy the type index.

58 (about 2%) are used to find things in various lists:

Find a variable given the name.

37 (about 1%) are calls to various conversion routines:

Convert the rider’s token to a ratio.

31 (about 1%) are used to generate actual machine code (plus those that appear in conditional statements, as above):

Attach $E8 and the address to the fragment.

And that accounts for 80% of the code in our compiler.

Only 57 of the remaining sentences (less than 2% of the whole) are mathematical in nature, a line here and there like these:

Add 4 to the routine’s parameter size.
Subtract the length from the local’s offset.
Multiply the type’s scale by the base type’s scale.
Calculate the length of the field’s type.
Round the address up to the nearest multiple of 4096.

And the rest are not formulaic at all. Stuff like:

Copy the field into another field.
Append the fragment to the current routine’s fragments.
Abort with “I was hoping for a definition but all I found was ‘” then the token.
Initialize the compiler.
Remove any trailing backslashes from the path name.
Reduce the monikette’s type to a type for utility use.
Eliminate duplicate nicknames from the type’s fields.
Prepend “original ” to the term’s name.
Extend the name with the rider’s token.
Unquote the other string.
Read the source file’s path into the source file’s buffer.
Generate the literal’s name.
Extract a file name from the compiler’s abort path.
Write the compiler’s exe to the compiler’s exe path.
Swap the monikettes with the other monikettes.
Skip any leading noise in the substring.
Scrub the utility index.
Fill the compiler’s exe with the null byte given the compiler’s exe size.
Position the rider’s token on the rider’s source.
Pluralize the type’s plural name.
Link.
Finalize the compiler.
Check for invalid optional info on the type.

And that’s why we say that most of what most programs do is easy stuff, stuff that can be conveniently expressed in a natural language. And that, in turn, is why we like programming in Plain English: the thoughts in our heads are typed in as Plain English “pseudo code” and, with a tweak here and there, that pseudo code actually compiles and runs. And is self-documenting, to boot.

Another Objection Answered

You may be thinking that natural language is just too verbose for programming. But is it really that bad? Let’s consider a couple of examples. In a traditional programming langauge, we might draw a box using a statement like this:

substring.draw ( box, color, source.text.font, source.text.alignment ) ;

Which is 10 words and 11 punctuation marks: 21 total elements.

The Plain English equivalent would be:

Draw the substring in the box with the color and the source’s text’s font and alignment.

Which is 16 words and 3 punctuation marks: 19 total elements.

Admittedly, the Plain English version requires a few more easy-to-type alphabetic characters (it’s difficult to say exactly how many since traditional coders put spaces in different places); but that’s a small price to pay for not having to learn (or think in) an artificial syntax.

Here’s another example:

if ( ! source.colorized ( ) ) color = black ;

Which is 5 words and 8 punctuation marks: 13 total elements.

Compared with the Plain English:

If the source is not colorized, put black into the color.

Which is 11 words and 2 punctuation marks: 13 total elements.

Again, it’s mostly a matter of whether you like to type words or (specialized) punctuation. And whether you like to think in two different syntactical and grammatical forms simultaneously. And whether you want your code to be self-documenting. And whether you want code that’s friendly for beginners. And whether you want to code in a language (like English) that will still be in common use 100 years from now. Personally, we think you may have lost some human perspective if you’ve come to think that “(!source.colorized())” is a good way of saying anything!

The Prototype

If you’re interested, you can download the whole shebang here:

www.osmosian.com/cal-4700.zip

It’s a small Windows program, less than a megabyte in size. But it’s a complete development environment, including a unique interface, a simplified file manager, an elegant text editor, a handy hexadecimal dumper, a native-code-generating compiler/linker, and even a wysiwyg page layout facility (that we used to produce the documentation). It is written entirely in Plain English. The source code (about 25,000 sentences) is included in the download. No installation is necessary; just unzip. Start with the “instructions.pdf” in the “documentation” directory and before you go ten pages you won’t just be writing “Hello, World!” to the screen, you’ll be re-compiling the entire thing in itself (in less than three seconds on a bottom-of-the-line machine from Walmart).

Thanks for your time and interest.


Gerry Rzeppa
Grand Negus of the Osmosian Order of Plain English Programmers


Dan Rzeppa
Prime Assembler of the Osmosian Order of Plain English Programmers

Teaching Kids to Program

We take a different approach to teaching kids how to program here at the Osmosian Order of Plain English Programmers.

The Interface

The first thing we do is remove all unnecessary and distracting clutter. This, for example, is what our full-screen Integrated Development Environment (IDE) looks like:

Alphabetical menus and a status message field at the top, work area in the middle, and tabs at the bottom. No window borders, no widgets, no icons, no tool bars, and no palettes. We thus encourage the student to focus on the content in the foreground, not the background (which we leave in the background where it belongs). Whoops! Almost forgot. No scroll bars. Ever. The right mouse button is used to shove content around — horizontally, vertically, and/or diagonally — and an Incremental Find facility is used to “leap” in large files (ala the late, great Jef Raskin). The Home, End, Page Up, Page Down and Arrow keys are also used, intuitively, to change the focus as necessary.

The file system is exposed to the programmer using full path names. This is the only view the programmer is given: there are no icons, and no alternate views in “open” and “save as” dialog boxes (because we don’t use or need dialog boxes). The students are thus introduced to the exact syntax that they will need to reference files in their programs, and they only have to maintain a single mental image of the file system in their budding brains.

Our student’s applications are also clutter-free. When they clear the screen, it is erased to black, top-to-bottom and side-to-side. Their applications are real, native programs, with access to the whole screen (and computer), so their dreams can come to life exactly as they imagined them. No sandboxes.

The Language

The second difference in our approach is that we program in natural, English-language sentences. Our “keywords” are articles (like aanthe and some), and prepositions (like inof and with, etc) rather than obscure words like CONST and EVAL and INSTANCEOF (which, technically, aren’t real words at all).

We also make a point of concentrating on semantics (WHAT is being said) rather than syntax (HOW it is being said). Routines in Plain English typically have multiple headers so they can be called in various ways. This routine, for example…

To erase the screen;
To blank out the screen;
To wipe off the screen;
To clear the screen:
Unmask everything.
Draw the screen’s box with the black color and the black color.
Refresh the screen.
Put the screen’s box into the context’s box.

…can be called four different ways:

Erase the screen.
Blank out the screen.
Wipe off the screen.
Clear the screen.

The skilled teacher, familiar with the way his students normally speak, typically provides pre-coded libraries of commonly used routines with headers in the “local dialect.” Students are also encouraged to teach the compiler to speak (and think) as they do, by adding headers to existing libraries, and by developing libraries of their own.

The Depth

The third difference in our approach is that we we use the same interface and language for both novices and experts alike. This is a system for kids, but it isn’t just a system for kids. We used this very interface and language ourselves to conveniently and efficiently create the whole shebang: uncluttered desktop, simplified file manager, elegant text editor, handy hexadecimal dumper, native-code-generating compiler/linker, and wysiwyg page layout facility for documentation and other creative writing and drawing tasks. So when the student is ready to dig deeper, he can simply dig. He doesn’t have to invest in a new shovel or find another plot of land. It’s all in one place, from “Hello, World!” to the machine code.

Hello World!

Speaking of “Hello, World!”, this is a version we often use to illustrate the fundamental concepts of sequence, conditional statements, and looping. This is what we tell the students to type in:

To run:
Start up.
Clear the screen.
Use medium letters. Use the fat pen.
Pick a really dark color.
Loop.
Start in the center of the screen.
Turn left 1/32 of the way.
Turn right. Move 2 inches. Turn left.
Write “HELLO WORLD”.
Refresh the screen.
Lighten the current color about 20 percent.
Add 1 to a count. If the count is 32, break.
Repeat.
Wait for the escape key.
Shut down.

And this is what they see on the screen when they run their programs (using the Run command, which is conveniently and intuitively located under the “R” menu):

Desert Landscapes

Programming is a textual, left-brain kind of activity. But students learn best when both sides of their brains are engaged. So most of our introductory exercises produce inspiring, graphical outputs to enliven both hemispheres and the corpus callosum that connects them. Here’s another sample program:

To run:
Start up.
Draw a desert landscape.
Wait for the escape key.
Shut down.

To draw a desert landscape:
Clear the screen.
Draw the sky.
Draw the sun.
Draw the birds.
Draw the sand.

To draw the sky:
Use the lightest sky blue pen.
Imagine a line across the middle of the screen’s box.
Loop.
Draw the line.
Refresh the screen.
Darken the current color about 3 percent.
Move the line up 1 pixel.
If the line is above the screen’s box’s top, break.
Repeat.

To draw the sun:
Pick a spot anywhere in the top middle 1/4 of the screen’s box.
Make a dot between 1/4 inch and 1 inch wide.
Center the dot on the spot.
Draw the dot with the lightest yellow color.

To draw the birds:
Pick a spot in the screen’s box about 1 inch above the middle.
Use the black pen.
Loop.
Move to the spot.
Face east.
Pick a width between 1/8 inch and 1/4 inch.
Draw a quarter circle given the width.
Turn around.
Draw another quarter circle given the width.
Move the spot about 1/2 inch in any direction.
Add 1 to a count. If the count is 3, break.
Repeat.

To draw the sand:
Use the lightest orange pen.
Imagine a line across the middle of the screen’s box.
Loop.
Draw the line.
Refresh the screen.
Darken the current color about 3 percent.
Move the line down 1 pixel.
If the line is below the screen’s box’s bottom, break.
Repeat.

Note the seamless integration of vector graphics and turtle graphics. Here’s the kind of artwork that program produces:

Optical Illusions

Optical illusions are always fun and inspiring. This is one of my personal favorites:

To run:
Start up.
Draw the crooked line illusion.
Wait for the escape key.
Shut down.

To draw the crooked line illusion:
Clear the screen.
Use the fat pen.
Imagine a big box 4 inches smaller than the screen’s box.
Imagine a line across the top of the big box.
Imagine a small box 1/2 inch by 1/2 inch.
Move the small box to the top left corner of the big box.
Loop.
Draw and fill the small box with the white color.
Move the small box right 1 inch.
Refresh the screen.
If the small box is still in the big box, repeat.
Move the small box close to the left side of the big box.
Draw the line with the red color.
Move the line down 1/2 inch.
Move the small box down 1/2 inch.
If the small box is still in the big box, repeat.
Draw the line with the red color.
Use medium letters.
Write “THE RED LINES ARE ALL STRAIGHT AND PARALLEL.”
with the gold pen at the bottom of the screen’s box.
Refresh the screen.

You’re going to need a ruler to check out this result:

Conclusion

It is our belief that the programmer of the future will program his machines much as we “program” an Amazon Echo or an Apple Siri or a Google Home or a Microsoft Cortana today. When, for example, my wife says:

“Echo, set a timer for 12 minutes. Then play a song by the Beatles.”

She’s writing and executing a short program, in English. Now if the devices listed above were themselves programmed in English, well, then we’d really be on the right track. Our Plain English prototype is evidence of the feasibility of such an approach. After all, if we can conveniently write a complete and efficient Compiler and IDE in English, why not an automated assistant? This is the 21st century, last I checked. Why shouldn’t both users and programmers be speaking to our machines in the same language we use to speak to each other?

Sudoku Solver

This is a Sudoku puzzle:

The object is to get one, and only one, of each digit in each row, column, and 3-by-3 block.

This is what it looks like after my Plain English program solves it:

And this is the Plain English routine that does the deed:

To solve a sudoku puzzle:
Get a blank cell. If the blank cell is nil, exit.
Loop.
Add 1 to a number. If the number is greater than 9, exit.
If the number is not valid in the blank, repeat.
Put the number into the blank.
Solve the puzzle. If the sudoku puzzle is solved, break.
Erase the blank cell.
Repeat.
Display message “Solved!”.

Technically speaking, it’s a “recursive backtracking” routine. It tries a number in a blank cell, then calls itself to try another number in another blank cell. If everything works out, we’re done. If we get stuck, it works backward, erasing the mistakes and trying again with a different starting number. It’s fun to watch; you just draw the puzzle on the screen right before each recursive call.

I noticed that there are other articles on various sites that use a similar algorithm, and I thought a brief comparison might be instructive and edifying. Below is a C/C++ equivalent of the above Plain English routine that I found:

boolSolveSudoku(intgrid[N][N])
{
    introw, col;
    // If there is no unassigned loc, we are done
    if(!FindUnassignedLocation(grid, row, col))
       returntrue; // success!
    // consider digits 1 to 9
    for(intnum = 1; num <= 9; num++)
    {
        // if looks promising
        if(isSafe(grid, row, col, num))
        {
            // make tentative assignment
            grid[row][col] = num;
            // return, if success, yay!
            if(SolveSudoku(grid))
                returntrue;
            // failure, unmake & try again
            grid[row][col] = UNASSIGNED;
        }
    }
    returnfalse; // this triggers backtracking
}

I showed the two versions to my wife, and she said, “Kind of makes you wonder why some people say that Plain English is too verbose!” So we did some counting:

Lines of code: Plain English, 10; C/C++, 27
(more than double in the C/C++ version)

Characters: Plain English, 334; C/C++, 681
(more than double in the C/C++ version)

Punctuation Marks: Plain English, 19; C/C++, 70
(more than three times as many in the C/C++ version)

Conclusion? Plain English is easier to learn, easier to remember, easier to think about, easier to type, easier to read. And reasonably compact (more compact in some cases, like the one above).

Hiding in Plain Sight

One of these pictures contains a hidden message 83 characters long:

Externally and internally, however, they are both very similar. Externally, they are what you see above. Internally, each of them is just a very long string of characters, where each character corresponds to a pixel in the image. There are just 27 allowed characters (numbers 64 to 90 on the ASCII chart):

@ A B C D E F G H I J K L M N O P Q R S T U V W X Y Z

“@” means black, and “Z” means white, with the letters in-between representing increasingly lighter shades of gray. The definition of the image on the left looks like this in our program:

The cipher is a string equal to “NNNNNOOOOOOOPP…”

It’s much longer, of course. 82,944 bytes, to be exact. This is the routine we use to draw it on the screen:

To display a cipher in a box (as a picture):
Put the cipher’s first into a byte pointer.
Put the box’s left-top into a spot.
Loop.
If the spot’s y is the box’s bottom, break.
Put the byte pointer’s target into a byte.
Convert the byte to a color.
Draw the spot with the color.
Add 1 to the byte pointer. If the byte pointer is greater than the cipher’s last, break.
Move the spot right 1 pixel.
If the spot’s x is the box’s right,
put the box’s left into the spot’s x; move the spot down 1 pixel; repeat.
Repeat.
Refresh the screen.

And this is the routine that we use to encode a message into a cipher image:

To encode a message in a cipher given a key:
Put the message’s first into a message byte pointer.
Put the cipher’s first into a cipher byte pointer.
Loop.
If the message byte pointer is greater than the message’s last, break.
Add the key to the cipher byte pointer.
If the cipher byte pointer is greater than the cipher’s last, break.
If the message byte pointer’s target is the space byte,
put the at-sign byte into the cipher byte pointer’s target.
If the message byte pointer’s target is not the space byte,
put the message byte pointer’s target into the cipher byte pointer’s target.
Add 1 to the message byte pointer.
Repeat.

We thus replace some of the bytes in the cipher image’s string with the characters of the hidden message. Since the message affects only a very small percentage of the image’s characters, and since the characters in the message come from the same subset of the ASCII chart, and since we choose a “key” that will spread the message as thinly as possible across the entire image, the visual effect is very hard to detect. In this case, there are 83 characters in the message. Can you spot 83 differences in the images above?

To get the message back out, we use this routine:

To decode a cipher into a message given a key:
Clear the message.
Put the cipher’s first into a byte pointer.
Loop.
Add the key to the byte pointer.
If the byte pointer is greater than the cipher’s last, break.
If the byte pointer’s target is the at-sign byte,
append the space byte to the message; repeat.
Append the byte pointer’s target to the message.
Repeat.

So let’s find out what that hidden message says. Here’s the test routine:

To run:
Start up.
Clear the screen to the tan color.
Imagine a box 3 inches by 3 inches in the middle of the screen.
Move the box left 1-5/8 inches.
Display the cipher in the box (as a picture).
Encode the message in the cipher given 997.
Move the box right 3-1/4 inches.
Display the cipher in the box (as a picture).
Decode the cipher into a decoded message given 997.
Write the decoded message below the box.
Refresh the screen.
Wait for the escape key.
Shut down.

Note that, in Plain English, “1-5/8 inches” means “one and five-eighths inches”, not “one minus five eighths inches”. Likewise for “3-1/4”.

Note also that we use 997 for the key because the message is 83 characters long, which is roughly 1/1000 of the 82,944 characters in the image, and 997 is the largest prime less than 1000.

The output on the screen looks like this:

If we want the “defects” in the encoded cipher to be less noticeable, we can use a shorter message or a larger picture.

On a personal side note, I must say I’m struck by the quality of the images. After all, we’re using a trivial data structure (a string) and only 27 shades of gray. Who wudda thunk?

Bresenham’s Circle Drawing Algorithm

A Quick Comparison

There are lots of great articles about Bresenham’s Circle Drawing Algorithm. Here, for instance. So I won’t describe the theory in this article. Instead, I’ll show a Plain English implementation of the same, and compare it with this C version from the aforementioned article:

#include (some obscure library name)
 
// Function to put pixels
// at subsequence points
voiddrawCircle(intxc, intyc, intx, inty)
{
    putpixel(xc+x, yc+y, RED);
    putpixel(xc-x, yc+y, RED);
    putpixel(xc+x, yc-y, RED);
    putpixel(xc-x, yc-y, RED);
    putpixel(xc+y, yc+x, RED);
    putpixel(xc-y, yc+x, RED);
    putpixel(xc+y, yc-x, RED);
    putpixel(xc-y, yc-x, RED);
}
 
// Function for circle-generation
// using Bresenham's algorithm
voidcircleBres(intxc, intyc, intr)
{
    intx = 0, y = r;
    intd = 3 - 2 * r;
    while(y >= x)
    {
        // for each pixel we will
        // draw all eight pixels
        drawCircle(xc, yc, x, y);
        x++;
 
        // check for decision parameter
        // and correspondingly
        // update d, x, y
        if(d > 0)
        {
            y--;
            d = d + 4 * (x - y) + 10;
        }
        else
            d = d + 4 * x + 6;
        drawCircle(xc, yc, x, y);
        delay(50);
    }
}
 
 
// driver function
intmain()
{
    intxc = 50, yc = 50, r2 = 30;
    intgd = DETECT, gm;
    initgraph(&gd, &gm, "");  // initialize graph
    circleBres(xc, yc, r);    // function call
    return0;
}

Now here’s the Plain English version:

To run:
Start up.
Clear the screen.
Draw a circle using the screen’s center and 3 inches.
Refresh the screen.
Wait for the escape key.
Shut down.

To draw a circle with a center spot and a radius:
Put the radius and 0 into a spot.
Put the radius times -2 plus 1 pixel with 1 pixel into a change pair.
Loop.
If the spot’s y is greater than the spot’s x, break.
Plot eight spots given the center and the spot.
Add 1 pixel to the spot’s y.
Add the change’s y to some error twips.
Add 2 pixels to the change’s y.
If the error times 2 plus the change’s x is less than or equal to 0, repeat.
Subtract 1 pixel from the spot’s x.
Add the change’s x to the error.
Add 2 pixels to the change’s x.
Repeat.

To plot eight spots given a center spot and a spot:
Privatize the spot.
Loop.
Plot the center plus the spot.
Negate the spot’s x. Plot the center plus the spot.
Negate the spot’s y. Plot the center plus the spot.
Negate the spot’s x. Plot the center plus the spot.
Negate the spot’s y.
Flip the spot. If a counter is past 1, break.
Repeat.

Lines of code: Plain English, 33; C, 56.
Almost 70% more in the C version.

Characters: Plain English, 1048; C, 1209.
About 15% more in the C version.

Now please don’t get me wrong. C is a great language if you don’t mind memorizing (and/or looking up) how to type things like:

initgraph(&gd, &gm, "");

It just seems kind of foreign and unnatural to me. After all, my native tongue is English, and when I’m thinking about a program, I typically think in English “pseudo-code.” The cool thing about Plain English is that the pseudo-code I had in mind actually runs.

Bear with me, please. This next part is really interesting.

Mathemagician Pie

As you may know from a previous article of mine, I joined the Mathemagician’s Club in my youth. This is my membership card:

But I quickly became an outcast for taking Kronecker’s side in the Kronecker/Cantor kerfuffle. Which is why, decades later, Plain English is still an integer-only language. Baby steps toward a more rational and natural mathematics. And with the algorithms above, we now have what we need to take another baby step.

Pi, in the mathemagician’s world, is defined as the circumference of a circle, c, divided by the circle’s diameter, d, thus:

Pi = c/d

It is a nasty, transcendental (ie, unreal) number that can’t be fully calculated by anyone or anything. But using the routines above, we are able to calculate precise values for c/d, because we’re dealing, not with mathemagical abstractions, but with real-life pixels that we can actually see and count (using whole numbers).

The question is, How should we measure the circumference of a circle? I know of two, obvious, whole-number methods: (1) we can count the pixels we draw, or (2) we can calculate the sum of the Minkowski distances between those pixels. These are the figures we get for circles of increasing diameter using each method:

If we figure the circumference using a pixel count circumference, we get a rational value for Pi that quickly converges to 2 and 5/6. On the other hand, if we calculate the circumference by tracing a Minkowski path through those pixels, we get a rational value for Pi that is very close to 4. This is exactly what we’d expect. The Pixel Count Pi is a little less than the mathemagician’s value, and the Minkowski Pi is a little more. But both are rational numbers based on real-world pixels.

A “pixelated” circle, I hope you can see, is not an approximation of a mathemagician’s “ideal” circle; that’s putting the cart before the horse. It’s the mathemagician’s imaginary circle that approximates the real-life pixelated circle. Which, as we’ve just seen, can be efficiently drawn, and measured, and analyzed, in Plain English, using whole numbers only.

Call me crazy, but don’t call me late for dinner!

Painting Like Monet

Claude Monet (1840-1926) was a French impressionist painter known for the “dab, dab, dab” style of his paintings. I can imagine him at work, peering at a spot on his subject, mixing an appropriate color of paint, then dabbing the corresponding spot on his canvas.

Let’s take a look at a Plain English program that does essentially the same thing as ol’ Monsieur Monet. We begin with some type definitions:

A subject is a string.
A model is a picture.
A painting is a picture.
A frame is a box.

And that leads us to the general outline of the program as a whole:

To run:
Start up.
Put “Purple Grapes” into a subject.
Find a model of the subject on Google.
Paint a painting using the model.
Reveal the painting with the subject as the title.
Wait for the escape key.
Shut down.

The critical routine is the one that does the actual painting. This is it:

To paint a painting using a model:
Resize the model to 4 inches by 4 inches.
Center the model in the screen’s box.
Move the model left 3 inches.
Draw the canvas.
Draw the model.
Loop.
Pick a spot anywhere near the model’s box.
Mix a color given the spot.
Move the spot right 6 inches.
Dab the color on the spot.
If a counter is past 30000, break.
Repeat.
Make a frame 4 inches by 4 inches.
Center the frame in the screen’s box.
Move the frame right 3 inches.
Outdent the frame 1/4 inch.
Draw the frame with the black color and the clear color.
Refresh the screen.
Extract the painting given the frame.

It begins by setting up the model a little left of center on the screen. Then it loops around, painting. Like Monsieur Monet, it picks spot on (or near) the model, mixes up an appropriate color, and dabs it on the corresponding spot on the canvas on right side of the screen.

This is the routine that does the actual dabbing:

To dab a color on a spot:
Pick an ellipse’s left-top within 3/32 inch of the spot.
Pick the ellipse’s right-bottom within 3/32 inch of the spot.
Draw the ellipse with the color and the color.

This is a screenshot of our Purple Grapes model (left) and painting (right) after about 2,000 such dabs:

Colors are matched exactly, unless they are very very light, in which case a color that will better match the background canvas is chosen. This is the routine that does the mixing:

To mix a color given a spot:
Get the color given the spot.
If the color is not very very light, exit.
Pick the color between the lightest gray color and the white color.

And here is a screenshot of the finished work, after 30,000 dabs, with a frame and a title:

Since we fetch our models from Google, the program is capable of painting almost any imaginable subject. (We don’t have to worry about usage issues, by the way, because this kind of transformative art falls under the “Fair Use” section of the Copyright Act of 1976, 17 U.S.C. § 107.) Here, for example, is a painting of a forest path:

And here is a painting of one of a geek’s most indispensable accessories:

Dab, dab, dab.

The Amazing MultiMaze

A MultiMaze is a maze with multiple, player-selected beginnings and endings. Here is a sample:

The object is to connect each green dot with one, and only one, red dot (with or without overlapping paths).

The Plain English program that generates MultiMazes is described below. We use the Aldous-Broder algorithm because it always generates a perfect maze, ie, a maze with without loops or closed circuits, and without any inaccessible areas. It is also a uniform maze generator, which means it generates all possible mazes of a given size with equal probability. And it’s a very simple algorithm that requires no extra storage or stack to implement. It’s not super fast, but it is reasonably fast, typically generating a full-page maze in less than 3 seconds.

The data structures are almost trivial. We define a maze in our program like this:

A maze is a thing with a width, a height, a cell size and some cells.

And a cell is defined this way:

A cell is a thing with a box,
a left flag, a top flag, a right flag, a bottom flag,
a visited flag, a start flag and an end flag.

A neighbor is a cell.

Each cell’s box describes its position in the maze’s “array”. The left, top, right, and bottom flags indicate whether or not the corresponding side of the cell is open or closed; the visited flag is required by the Aldous-Broder algorithm, and the start and end flags indicate which cells will be marked with a green or red dot. (By the way, that first definition fit on one line on the screen when I wrote it because we use a tight, proportionally-spaced font and our uncluttered editor always spans the entire width of the screen. Turns out the things that make Plain English sentences easy-to-read — like one thought per line — are not the same things that make artificial, mathematically-influenced programming languages easy-to-read.)

The main routine in our program reads like this:

To run:
Start up.
Clear the screen with the tan color.
Create a maze 10 inches by 8 inches using 1/4 inch for the cells.
Display the maze with title and instructions.
Destroy the maze.
Wait for the escape key.
Shut down.

Most of that is self-explanatory, so I’ll jump to the interesting stuff. This is the top-level create routine:

To create a maze a width by a height using a size for the cells:
Allocate memory for the maze.
Put the width into the maze’s width.
Put the height into the maze’s height.
Put the size into the maze’s cell size.
Create some cells for the maze.
Apply the Aldous-Broder algorithm to the maze.
Select starting and ending cells in the maze.

The latter three lines do most of the work. The first calls this routine to create the maze’s cells:

To create some cells for a maze:
If a spot’s left is greater than the maze’s width, break.
If the spot’s top is greater than the maze’s height,
add the maze’s cell size to the spot’s left; repeat.
Create a cell of the maze’s cell size at the spot.
Append the cell to the maze’s cells.
Add the maze’s cell size to the spot’s left.
If the spot’s left is less than the maze’s width, repeat.
Put 0 into the spot’s left.
Add the maze’s cell size to the spot’s top.
Repeat.

Note that the cells are stored in a doubly-linked list, not in an array (as you might expect), because Plain English does not have a native array type (arrays are not native to English grammar).

This is the routine that creates an individual cell:

To create a cell of a size at a spot:
Allocate memory for the cell.
Put the spot and the spot plus the size into the cell’s box.
Set the cell’s left flag.
Set the cell’s top flag.
Set the cell’s right flag.
Set the cell’s bottom flag.
Clear the cell’s visited flag.

Once we’ve got our cells, we connect them in the right spots using the Aldous-Broder algorithm I mentioned earlier. This is the Plain English implementation:

To apply the Aldous-Broder algorithm to a maze:
Pick a cell in the maze. Set the cell’s visited flag.
Loop.
If all of the maze’s cells have been visited, break.
Pick a neighbor of the cell in the maze.
If the neighbor’s visited flag is not set,
connect the cell with the neighbor.

Set the neighbor’s visited flag.
Put the neighbor into the cell.
Repeat.

I won’t explain what that does because I’d simply be repeating the “code” in this paragraph. Instead, I’ll show you the support routines that make that work. Like this one:

To pick a neighbor of a cell in a maze:
Void the neighbor.
Loop.
Pick a number between 1 and 4.
If the number is 1,
find the neighbor above the cell in the maze.

If the number is 2,
find the neighbor to the right of the cell in the maze.

If the number is 3,
find the neighbor below the cell in the maze.

If the number is 4,
find the neighbor to the left of the cell in the maze.

If the neighbor is nil, repeat.

A neighbor might be above, below, to the right, or to the left of the current cell. We want to pick one of those, if it exists, randomly. So we pick a number between 1 and 4 (corresponding to above, right, below, and left) and see what we can find there. If we fail to find a neighbor in that relative location, we try again and again until we succeed. After all, every cell has at least 2 neighbors.

The routine below is typical of the four “find” routines called by the above routine:

To find a neighbor above a cell in a maze:
Void the neighbor.
Loop.
Get the neighbor from the maze’s cells.
If the neighbor is the cell, repeat.
If the neighbor is nil, break.
If the neighbor’s bottom line is the cell’s top line, break.
Repeat.

Now this is how we connect one cell with another. Cells start with all of their wall flags set, so we simply have to remove the appropriate walls (in both cells) to make a path:

To connect a cell with a neighbor:
If the cell’s top line is the neighbor’s bottom line,
clear the cell’s top flag;
clear the neighbor’s bottom flag; exit.

If the cell’s right line is the neighbor’s left line,
clear the cell’s right flag;
clear the neighbor’s left flag; exit.

If the cell’s bottom line is the neighbor’s top line,
clear the cell’s bottom flag;
clear the neighbor’s top flag; exit.

If the cell’s left line is the neighbor’s right line,
clear the cell’s left flag;
clear the neighbor’s right flag; exit.

We know the passed cells are neighbors, but we didn’t keep track of their relative locations, so we check all four. (And again, all those IFs fit on one line each on the screen in our editor.)

And that’s it for the Aldous-Broder algorithm, except to see if we’re done, which is this routine’s job:

To decide if all of some cells have been visited:
Get a cell from the cells.
If the cell is nil, say yes.
If the cell’s visited flag is not set, say no.
Repeat.

We now have a perfectuniform maze, and we just have to select some starting and ending points. We pick eight of each, almost at random. I say almost because we always select the top left cell as a starting point, and the bottom right cell as an ending point, to make sure that there is a least one long path available for the player.

To select starting and ending cells in a maze:
Set the maze’s cells’ first’s start flag.
Set the maze’s cells’ last’s end flag.
Loop.
Pick a cell in the maze.
If the cell’s start flag is set, repeat.
If the cell’s end flag is set, repeat.
Add 1 to a count. If the count is greater than 14, break.
If the count is odd, set the cell’s start flag; repeat.
If the count is even, set the cell’s end flag; repeat.

And that’s the gist of the whole program. A couple of side notes on Plain English looping, however, might be helpful here.

1. When there is no explicit LOOP label, REPEAT means “repeat from the top of the routine”.

2. BREAK always passes control to the first statement following the last REPEAT.

3. Looping through lists almost always happens like this:

To draw some cells:
Get a cell from the cells.
If the cell is nil, break.
Draw the cell with the black pen.
Repeat.
Refresh the screen.

If a nil pointer is passed to the “Get” routine, the first item on the list, if any, is returned. “A cell” in this case, indicates a new local variable initialized to zero, so that’ll work. If a non-nil pointer is passed to the “Get” routine, the next item on the list, if any, is returned. A nil pointer is returned when the whole list has been processed. All of that is done, not by the compiler, but by a generic routine in our standard “noodle” library:

To get a thing from some things:
If the things are empty, void the thing; exit.
If the thing is nil, put the things’ first into the thing; exit.
Put the thing’s next into the thing.

But that’s all stuff for other articles. Back to the maze. This is how we actually draw those cells, taking all of those little flags into account:

To draw a cell with a pen:
If the cell’s left flag is set,
draw the cell’s left line with the pen.
If the cell’s top flag is set,
draw the cell’s top line with the pen.

If the cell’s right flag is set,
draw the cell’s right line with the pen.

If the cell’s bottom flag is set,
draw the cell’s bottom line with the pen.

Put the cell’s width divided by 3 into a width.
If the cell’s start flag is set,
draw a dot the width wide at the cell’s box’s center with the dark green pen.
If the cell’s end flag is set,
draw another dot the width wide at the cell’s box’s center with the dark red pen.

Almost forgot! This is how we pick a random cell anywhere in the maze:

To pick a cell in a maze:
Pick a number between 1 and the maze’s cells’ count.
Void the cell.
Loop.
Get the cell from the maze’s cells.
If the cell is nil, break.
Add 1 to a count. If the count is the number, break.
Repeat.

And that’s all I have to say about that. I’m speechless. Amazing.

Anagrams

An anagram is a word spelled by rearranging the letters of another word. The “other word” may or may not be a real word; if it is not, we say the letters have been jumbled or scrambled. Note that some “other words” yield more than one anagram. The letters TPSO, for example, can be rearranged to spell OPTS, POST, POTS, SPOT, STOP, and TOPS.

The obvious way to extract an anagram from a jumbled string of letters is to arrange the letters in all possible ways, checking each arrangement against a lexicon (ie, a list of valid words). This brute-force approach can quickly get out of hand, however. The number of ways that three unique letters can be arranged is only 3 times 2 times 1, or 6; but the number of ways that 9 unique letters can be arranged is 362,880. So we need a better way.

The not-so-obvious way to extract an anagram from a jumbled string is to first convert the lexicon into a dictionary where each entry in the dictionary is a sorted word, and the “definition” is the original, unscrambled word. These are the Plain English type definitions we need to describe that:

A dictionary is a thing with some entries.
An entry is a thing with a sorted string and a string.

Our Plain English development system includes a lexicon of the 64,000 most commonly used English words in the form of a text file, one word per line, so we can use that to make our dictionary. These are the Plain English routines that do that:

To create a dictionary:
Allocate memory for the dictionary.
Put “z:\g4g articles\anagrams\lexicon.txt” into a path.
Read the path into a buffer.
Slap a rider on the buffer.
Loop.
Get a string from the buffer given the rider.
If the string is blank, break.
Trim the string.
Sort the string into a sorted string.
Add an entry to the dictionary using the sorted string and the string.
Repeat.

To add an entry to a dictionary given a sorted string and a string:
Allocate memory for the entry.
Put the string into the entry’s string.
Put the sorted string into the entry’s sorted string.
Append the entry to the dictionary’s entries.

A random sample of entries from our “anagram dictionary” looks like this:

aeprrs parser
aeprrss parsers
aeprrss sparser
aeprrssstu superstars
aeprrsstu superstar
aeprrssy sprayers
aeprrstu raptures
aeprrsy prayers
aeprrsy sprayer
aeprrtu rapture

Note that some of the sorted words (like aeprrss) have more than one “definition” (like parsers and sparser).

Now we can find all the anagrams for a given string simply by sorting the input string and searching for matches in the dictionary. Here are the Plain English routines that do that:

To run:
Start up.
Create the dictionary.
Loop.
Write “Enter a scrambled word: ” on the console without advancing.
Read a string from the console. If the escape key is down, break.
Unscramble the string.
Repeat.
Write “Done…” on the console.
Destroy the dictionary.
Shut down.

To unscramble a string:
Trim the string.
Lowercase the string.
Sort the string into a sorted string.
Loop.
Get an entry from the dictionary’s entries.
If the entry is nil, break.
If the entry’s sorted string is not the sorted string, repeat.
Write the entry’s string on the console.
Repeat.

A typical run looks like this:

It takes a second or two to create the dictionary, but that only has to be done once, and it can be saved for later use. The unscrambling part is aaeinnnossttu. Whoops! Sorry. I meant to say, “instantaneous.”

A Jigsaw Puzzle

This is a fun little program that cuts a picture into pieces, splatters them around the screen, then lets the user put them back together by pushing them around with the mouse. Here are the Plain English type definitions:

A puzzle is a thing with a box, a picture and some pieces.
A piece is a thing with a box and a picture.

And here is the main routine:

To run:
Start up.
Create a puzzle from “c:\g4g articles\jigsaw\maga.jpg”.
Display the puzzle.
Show the arrow cursor.
Loop.
Deque an event.
If the event is nil, break.
If the event’s kind is “key down”, break.
If the event’s kind is not “left click”, repeat.
Track the mouse on the puzzle.
Repeat.
Destroy the puzzle.
Shut down.

These are the Plain English routines that create a puzzle:

To create a puzzle from a path:
Allocate memory for the puzzle.
Make the puzzle’s box 8 inches by 8 inches.
Center the puzzle’s box in the screen’s box.
Fetch the puzzle’s picture from the path.
Resize the puzzle’s picture to 8 inches by 8 inches.
Center the puzzle’s picture in the puzzle’s box.
Cut the puzzle into pieces.
Splatter the puzzle’s pieces.

To cut a puzzle into pieces:
Draw the puzzle’s picture.
Put the puzzle’s left-top into a spot.
Loop.
Allocate memory for a piece. Append the piece to the puzzle’s pieces.
Put the spot and the spot plus 2 inches into the piece’s box.
Extract the piece’s picture using the piece’s box.
Add 2 inches to the spot’s left.
If the spot’s left is less than the puzzle’s right, repeat.
Put the puzzle’s left into the spot’s left.
Add 2 inches to the spot’s top.
If the spot’s top is the puzzle’s bottom, break.
Repeat.

To splatter some pieces:
Make a box 1 inch smaller than the screen’s box.
Loop.
Get a piece from the pieces.
If the piece is nil, break.
Pick a spot anywhere in the box.
Round the spot to the nearest multiple of 1/4 inch.

Center the piece’s box on the spot.
Center the piece’s picture on the spot.
Repeat.

This is how we draw a puzzle’s pieces on the screen:

To display a puzzle:
Clear the screen without refreshing.
Loop.
Get a piece from the puzzle’s pieces.
If the piece is nil, break.
Draw the piece’s picture.
Repeat.
Refresh the screen.

And this is typical of how the splattered pieces of a puzzle look:

These are the routines we use to track the user’s mouse movements:

To track the mouse on a puzzle:
Find a piece of the puzzle given the mouse’s spot.
If the piece is nil, exit.
Loop.
If the mouse’s left button is up, exit.
Put the mouse’s spot into a spot.
Round the spot to the nearest multiple of 1/4 inch.
Center the piece’s box on the spot.
Center the piece’s picture on the spot.
Display the puzzle.
Repeat.

To find a piece of a puzzle given a spot:
Get the piece from the puzzle’s pieces (backwards).
If the piece is nil, exit.
If the spot is not in the piece’s box, repeat.

Note that we “snap” the pieces to a 1/4-inch grid so they’ll fit together easily. Note also that we search for pieces in the opposite order they are drawn (ie, backwards) so that the front-most piece gets selected first.

This is what the pieces of our sample puzzle look like once they’ve been properly arranged:

It’s a painting I did a while back. I called it “Make America GREEN Again.”

The Travelling Salesman

Our goal in this exercise is to find a reasonably short route through an arbitrary number of cities splattered, randomly, on a map (or in this case, on the screen). We begin with just two Plain English type definitions:

A city is a thing with a number, a spot and a visited flag.
A nearest neighbor is a city.

Then we create a list of five cities at random locations on the screen using this routine:

To create some cities:
Put 5 into a number.
Make a box 1 inch smaller than the screen’s box.
Loop.
Pick a spot anywhere in the box.
Allocate memory for a city.
Put the spot into the city’s spot.
Append the city to the cities.
Subtract 1 from the number. If the number is 0, break.
Repeat.
Put 1 into the cities’ first’s number.

The starting city is at the top of the list and is marked with the number “1”. When we draw those cities on the screen they look like this:

Then we arrange those cities into a reasonable sequence for the travelling salesman. We do this using the Nearest Neighbor algorithm. It doesn’t guarantee the shortest possible path, but it is very simple and very fast and produces a reasonably short path through the cities. Great engineering seeks a balance between competing objectives.

This is the Plain English routine that implements the Nearest Neighbor algorithm:

To arrange some cities for a travelling salesman (nearest neighbor algorithm):
Get a city from the cities.
If the city is nil, break.
Set the city’s visited flag.
Find a nearest neighbor to the city in the cities.
If the nearest neighbor is nil, break.
Remove the nearest neighbor from the cities.
Insert the nearest neighbor into the cities after the city.
Repeat.
Number the cities.
Draw the cities.

Finding the nearest neighbor of a city requires calculating the distance between the current city and all of the other cities, which is accomplished using this routine:

To find a nearest neighbor to a current city in some cities:
Void the nearest neighbor.
Put the largest number into a shortest distance.
Loop.
Get a city from the cities.
If the city is nil, break.
If the city is the current city, repeat.
If the city’s visited flag is set, repeat.
Get a distance between the city and the current city.
If the distance is not less than the shortest distance, repeat.
Put the distance into the shortest distance.
Put the city into the nearest neighbor.
Repeat.

Since we Osmosians don’t believe in transcendental functions (like sine and cosine), we calculate the Minkowski distance between the cities using this simple and speedy routine:

To get a distance between a spot and another spot (minkowski):
Put the spot’s x minus the other spot’s x into a number.
De-sign the number.
Put the spot’s y minus the other spot’s y into another number.
De-sign the other number.
Put the number plus the other number into the distance.

Once the cities are arranged in a proper sequence, we can redraw the map like this:

And that’s about all there is to it. But before we go, let’s see what it does with 99 cities (the biggest number that will fit inside a city circle on the map). I eliminated the intermediate lines and the distance numbers for this test to keep the screen from getting too cluttered:

Less than a second to run, and a pretty good path. I also tried it with 1,000 cities (and smaller city markers, the starting city marked in red). It still took less than a second…

…but you can see it got lost a couple of times. But who knows? Maybe our salesman likes a long, quiet drive now and then, to collect his thoughts or listen to the radio.

Fibonacci Fables

The Fibonacci Sequence is a sequence of numbers where each number equals the sum of the two preceding numbers. Except, of course, for the second number in the series, because it only has one number preceding it. So we cheat a little at the start, putting two ones there to get the thing going.

This is a Plain English program that lists all the Fibonacci Numbers less than 1000:

To run:
Start up.
Put 1 into a first number. Write the first on the console.
Put 1 into a second number. Write the second on the console.
Loop.
Add the first to the second giving a third number.
If the third is greater than 1000, break.
Write the third on the console.
Put the second into the first.
Put the third into the second.
Repeat.
Wait for the escape key.
Shut down.

These are the numbers we get when we run that:

1, 1, 2, 3, 5, 8, 13, 21, 34, 55, 89, 144, 233, 377, 610, 987

Now here’s a little program that does something interesting with the first few of those numbers:

To run:
Start up.
Clear the screen with the tan color.
Start in the middle of the screen facing south.
Move 1-3/4 inches right and 1 inch down.
Draw some fibonacci squares starting with 1/4 inch.
Refresh the screen.
Wait for the escape key.
Shut down.

To draw some fibonacci squares starting with a length:
Use the brown pen.
Put the length into a first length. Draw a fibonacci square using the first length.
Put the length into a second length. Draw the fibonacci square using the second length.
Loop.
Add the first length to the second length giving a third length.
Draw the fibonacci square using the third length.
If the third length is greater than 4 inches, break.
Put the second length into the first length.
Put the third length into the second length.
Repeat.

To draw a fibonacci square given a length:
Stroke the length. Turn left.
Move the length. Turn left. Move the length.

The result on the screen looks like this:

You can see that once we get rolling, each square mates with the two squares that came before it.

And with just two more routines, we can lay a Fibonacci Spiral on top of those Fibonacci Squares. Here are the additional routines:

To draw a fibonacci spiral starting with a length:
Use the fat black pen.
Put the length into a first length.
Draw a quarter circle the first length times 2 wide (backwards).
Put the length into a second length.
Draw the quarter circle the second length times 2 wide (backwards).
Loop.
Add the first length to the second length giving a third length.
Draw the quarter circle the third length times 2 wide (backwards).
If the third length is greater than 4 inches, break.
Put the second length into the first length.
Put the third length into the second length.
Repeat.

To draw a quarter circle a width wide (backwards):
Put the width times 355/113 divided by 96 into a segment length.
Loop.
Turn left 1/96 of the way.
Stroke the segment length.
Add 1 to a count.
If the count is 24, exit.
Repeat.

When we run that, the nifty result we get looks like this:

You probably noticed that I had to use an approximation for pi (355/113) because Plain English is a whole-number-only language. I wasn’t entirely happy with that, so I got into our built-in wysiwyg page editor to see if I could get to a Fibonacci Spiral without using pi, or an approximation of pi, at all. I started by drawing the Fibonacci Squares, by hand:

It was easy because our editor has a handy snap-to-grid feature. Then I colored that “grid” light blue and drew a simple polygon on top of it in black:

Finally, I smoothed that polygon three times. Et voila! An almost-Fibonacci Spiral:

Our all-integer smoothing technique is described in another article I’ve posted on this blog.

I admit the two spirals aren’t exactly the same, but then neither are all the supposed Fibonacci Spirals in the real world. It is nearly (if not entirely) impossible, for example, to fit a Fibonacci Spiral to a real-life Nautilus shell. Check it out. Look closely at all those overlaid images on Google and you’ll see that the supposed correspondence is just one more mathemagical myth; a Fibonacci Fable, we might say.

But I don’t want to leave this article on a negative note, so let’s have a little fun with a simpler kind of spiral that is drawn with this routine:

To draw a spiral starting with some twips;
To draw a spiral given a size:
Privatize the size.
Loop.
Draw a half circle given the size.
Divide the size by 2.
Add 1 to a count. If the count is 5, break.
Repeat.

But let’s not just draw one; let’s draw lot’s of ’em:

To run:
Start up.
Clear the screen with the tan color.
Start in the middle of the screen facing north.
Move 2 inches left and 1 inch down.
Loop.
Use the brown pen. Use the fat pen.
Draw a spiral starting with 6 inches.
Turn 1/10 of the way around.
Add 1 to a count. If the count is 5, break.
Repeat.
Refresh the screen.
Wait for the escape key.
Shut down.

Here’s the result:

As Israel Kamakawiwo’ole used to sing, “What a Wonderful World!” It’s cool that we have the privilege, as Johannes Kepler put it, “of thinking God’s thoughts after Him.” Credit where credit is due. I suspect that when we finally figure out exactly what makes a Nautilus shell what it is, we’ll find it’s more like an algorithm than an equation.

Sierpinski & Koch

Two of the most famous fractals are the Sierpinski Triangle and the Koch Snowflake.

A Sierpinski Triangle in Plain English

This is a Plain English description of how to draw a Sierpinski Triangle:

To draw a Sierpinski Triangle starting with a size:
If the size is less than 1/8 inch, exit.
Draw another Sierpinski Triangle starting with the size divided by 2.
Draw a line using the size for the length.
Refresh the screen.
Turn right 1/3 of the way around.
Add 1 to a count. If the count is 3, break.
Repeat.

If we call the above routine from this top-level routine…

To run:
Start up.
Clear the screen with the tan color. Use the dark brown pen.
Start 4 inches to the left and 3-1/2 inches down from the screen’s center.
Turn right 1/12 of the way around.
Draw a Sierpinski Triangle starting with 8 inches.
Wait for the escape key.
Shut down.

…this is what we get on the screen:

Triangles within triangles within triangles. Nifty.

A Koch Snowflake in Plain English

Now these are the Plain English routines we need to draw a Koch Snowflake:

To draw a Koch Snowflake given a size and a depth:
Loop.
Draw a Koch Curve with 3 inches and the depth.
Refresh the screen.
Turn left 1/3 of the way around.
Add 1 to a count. If the count is 3, break.
Repeat.

To draw a Koch Curve given a size and a depth:
If the depth is 0, draw a line using the size for the length; exit.
Put the size divided by 3 into a new size.
Draw the Koch Curve given the new size and the depth minus 1.
Turn right 1/6 of the way.
Draw a second Koch Curve given the new size and the depth minus 1.
Turn left 2/6 of the way.
Draw a third Koch Curve given the new size and the depth minus 1.
Turn right 1/6 of the way.
Draw a fourth Koch Curve given the new size and the depth minus 1.

If we position ourselves properly on the screen and call the first routine above four times, increasing the depth by one each time, we get this on the screen:

1. At the top-left, we see that our snowflake, at depth zero, is just a simple triangle.

2. At the top-right, one level deeper, we see that each of the sides of the triangle has been divided into three parts, the middle part being replaced with a “peak”.

3. Continuing clockwise around the screen, at the bottom-right, we see that at the next level down, each of the sides of preceding figure is again divided into thirds, with the middle third being replaced by a peak of the appropriate size.

4. Finally, at the bottom-left, yet another level down, we see the finished snowflake. I say “finished” even though we could go deeper and deeper if our screen had the resolution to display it clearly.

A Koch Triangle in Plain English

Something curious happens if, when we’re drawing a Koch Snowflake, we turn right instead of left at each of the original vertices (the revised routine is shown below, with the modified word in all uppercase letters).

To draw a Koch Snowflake given a size and a depth:
Loop.
Draw a Koch Curve with 3 inches and the depth.
Refresh the screen.
Turn RIGHT 1/3 of the way around.
Add 1 to a count. If the count is 3, break.
Repeat.

The result is an “inside-out” snowflake, or what I call, a Koch Triangle:

Comparing the top-right figure with the finished bottom-left figure, perhaps a better name would be “The Mitsubishi Logo on Steroids.”

Another curious thing happens when we tile some Koch Snowflakes; we get the flakes and the triangle together. Here’s the main routine…

To run:
Start up.
Clear the screen with the tan color. Use the dark brown pen.
Turn right 7/12 of the way around. Move up 1/2 inch.
Loop.
Draw a Koch Snowflake given 4 inches and 3.
Turn right 1/3 of the way around.
Add 1 to a count. If the count is 3, break.
Repeat.
Wait for the escape key.
Shut down.

…and here’s the result:

We can get other interesting results if we base our snowflakes on, say, a hexagon rather than a triangle. Here’s a main routine that does that (by turning 1/6 instead of 1/3 of the way around), with some tiling as well:

To run:
Start up.
Clear the screen with the tan color. Use the dark brown pen.
Turn right 7/12 of the way around.
Loop.
Draw a Koch Snowflake given 3 inches and 3.
Turn right 1/6 of the way around.
Add 1 to a count. If the count is 6, break.
Repeat.
Wait for the escape key.
Shut down.

And here’s what the screen looks like when we run that:

Well, I could go on all day with this kind of thing, but I’m sure you get the idea. More fun and interesting programs written entirely in Plain English.

Random Numbers

When a programmer asks for a a series of random numbers, he typically doesn’t want truly random numbers. What he generally wants is numbers that are evenly distributed over a given range, supplied in an unexpected sequence.

Plain English’s random number generator is a hybrid of English and Intel x86 machine code (for speed). It uses a “seed” that is initialized to the system’s tickcount when a program starts running. The seed can be set by the programmer to a specific value if he wants the same sequence of numbers to be generated with each run. This is the routine:

To pick a random number between a min number and a max number:
Put the seed’s whereabouts into eax.
Intel $8BC8. \ mov ecx,eax \ calculate zero based max
Intel $8B8510000000. \ mov eax,[ebp+16]
Intel $8B00. \ mov eax,[eax] \ dereference
Intel $8B9D0C000000. \ mov ebx,[ebp+12]
Intel $2B03. \ sub eax,[ebx]
Intel $40. \ inc eax \ adjust randseed
Intel $691105840808. \ imul edx,[ecx],134775813
Intel $42. \ inc edx
Intel $8911. \ mov [ecx],edx
Intel $F7E2. \ mul edx
Intel $0313. \ add edx,[ebx] the min
Intel $8B9D08000000. \ mov ebx,[ebp+08] 
Intel $8913. \ mov [ebx],edx
Put the random number into the context’s number.

Everything following a backslash to the end of the line is a comment. Comments appear in a different color than “code” in our editor so they can be easily ignored. (The colors in this article are reversed.) The algorithm is essentially the same as the linear congruential generatorthat was used in Borland’s Turbo Pascal.

Now here is a program that illustrates exactly how uniform a distribution that routine generates:

To run:
Start up.
Clear the screen using the tan color.
Make a box 2 inches by 2 inches.
Center the box on the screen. Move the box left 5 inches.
Fill and label the box with random spots stopping at 100.
Move the box right 2-1/2 inches.
Fill and label the box with random spots stopping at 1000.
Move the box right 2-1/2 inches.
Fill and label the box with random spots stopping at 10000.
Move the box right 2-1/2 inches.
Fill and label the box with random spots stopping at 100000.
Move the box right 2-1/2 inches.
Fill and label the box with random spots stopping at 1000000.
Refresh the screen.
Wait for the escape key.
Shut down.

To fill and label a box with random spots stopping at a number:
Privatize the number.
Draw the box with the brown pen.
Loop.
Pick a spot anywhere in the box.
Draw the spot with the brown pen.
If a counter is past the number, break.
Repeat.
Write the number under the box.
Refresh the screen.

To pick a spot anywhere in a box:
Pick the spot’s x between the box’s left and the box’s right.
Pick the spot’s y between the box’s top and the box’s bottom.

And here is what we get when we run it:

You can see that the distribution is reasonably uniform in each case. Plain English uses a 96 pixel-per-inch resolution, so a 2-inch square contains 36,864 spots. It takes many more iterations than that to completely fill the box, however, because the random number generator sometimes returns a number more than once. It returns fewer duplicates, of course, when the range (the size of the box, in this case) is larger. Just 10,000,000 iterations, for example, was enough to almost completely fill my entire, 1,310,720-pixel screen.

Plain English Programming — Jackson Pollock’s Alphabet Soup

Jackson Pollock was an “artist” who “painted” by pouring paint on a canvas on the floor. This is a close-up portion of one of his most famous works, aptly entitled, “Number 8”:

When I’m not programming, I’m often painting. But it turns out that I’m constitutionally incapable of “painting” using Pollock’s technique simply because I think too much about what I’m trying to paint. This, for example, is what came out when I attempted to apply his technique while thinking about him at work in his studio:

So I thought, maybe I can write a Plain English program to approximate Pollock’s unique style. I just need an easy way to simulate the drippy calligraphic strokes that the “master” used to use. And the moment the word “calligraphic” popped into my head, I thought, “Of course! All I really need is one of those fancy, scripty fonts to work with. A quick search of dafonts.com quickly yielded “Jellyka Saint-Andrew’s Queen,” exactly the kind of font I had in mind. It was free, but I sent a donation to the author since the font served me so well. And because people should get paid for their work.

This is what the uppercase letters and squiggly braces look like on a page in Plain English’s built-in page editor:

And this is the Plain English program I wrote to make use of that font:

To run:
Start up.
Clear the screen.
Make a box 6 inches by 6 inches. Center the box on the screen. Mask outside the box.
Loop.
Pick a letter from “{ABCDEFGHIJKLMNOPQRSTUVWXYZ}”.
Pick a spot within 1/2 inch of the box.
Pick a pollock color.
Pick a size between 1/16 inch and 2 inches.
Put “Jellyka, Saint-Andrew’s Queen” and the size into a font.
Draw the letter at the spot with the pollock color and the font (varying the thickness).
If a counter is past 2000, break.
If the counter is evenly divisible by 100, Rotate the canvas.
Repeat.
Refresh the screen.
Wait for the escape key.
Shut down.

In short, the program just draws random letters at random spots in colors typical of Pollock’s Number 8 painting, over and over and over, rotating the canvas every 100 letters (to simulate Jackson walking around his canvas on the floor).

The subroutine that chooses a “pollock color” looks like this:

To pick a pollock color:
If you feel like it, exit.
Pick a number between 1 and 100.
If the number is less than 35, put the darkest yellow color into the pollock color; exit.
If the number is less than 50, put the black color into the pollock color; exit.
If the number is less than 80, put the lightest orange color into the pollock color; exit.
If the number is less than 85, put the light red color into the pollock color; exit.
If the number is less than 94, put the light orange color into the pollock color; exit.
If the number is less than 95, put the lightest yellow color into the pollock color; exit.
Put the white color into the pollock color.

“If you feel like it” means 50% of the time, which in this case leaves the color as it was for another round.

The subroutine that varies the thickness of the letters looks like this:

To draw a letter at a spot with a pollock color and a font (varying the thickness):
Draw the letter at the spot
with the pollock color and the font.

If you feel like it, move the spot 1 pixel right
and 1 pixel down; repeat.

Add 1 to a count. If the count is less than 3, repeat.

As you can see, we sometimes move the spot right and down and redraw the letter to make it a little thicker. Sometimes more than once.

This is what shows up on the screen after the first two dozen letters are drawn:

And this is what the finished work looks like:

Et voila! Not exactly an original Pollock, but definitely in the ballpark. Fun to write, fun to run.

Parsing with Riders

A Plain English compiler, as you might expect, needs to parse text simply, flexibly, and quickly. We do that with a thing we call a rider. It’s a generalized version of an idea (with the same name) that Niklaus Wirth taught us about in his magnificent Oberon system. To understand our implementation and use of riders, however, you must first understand the way we implement…

Strings

The prototype string record, in Plain English, is defined like this:

A string has a first byte pointer and a last byte pointer.

The data bytes of a string are dynamically allocated in a contiguous sequence on the Heap. A string is considered blank if the first byte pointer is nil (or greater than the last byte pointer). When a string consists of just one-byte, the pointers are equal. The length of a string is thus the last byte’s address minus the first byte’s address plus one. Our compiler generates all the code and calls necessary to manage string memory.

And that brings us to…

Substrings

substring is any contiguous part of a string, up to and including the whole string. In Plain English it is defined like this:

A substring is a string.

In other words, the substring type not only looks like a string (with a first byte pointer and a last byte pointer), but is also compatible with string type, which allows most of our string routines to operate on either type.

And now we’re ready to talk about…

Riders

rider, in Plain English, is defined like this:

A rider has an original substring, a source substring and a token substring.

When we…

Slap a rider on a string.

…the pointers in the original and source substrings are set to span the entire string. At the same time, the token’s first byte pointer is set to the first byte of the string, and the token’s last byte pointer is set to nil (making the token substring initially blank, but ready to be extended).

Now when we…

Bump a rider.

…we add 1 to the source’s first byte pointer, and add 1 to the token’s last byte pointer. It thus appears that we have “moved” a byte of the source into the token, though no physical movement of string data has actually taken place. Very fast, even on huge strings. We keep the original substring pointers intact so we can check, as necessary, to make sure we don’t fall off either end of the source.

Note that we can peek back at previous bytes in the source string simply by subtracting from the source’s first byte pointer.

Note also that we can have as many riders on a string as we need, so we can parse different parts of the source at the same time.

Note, thirdly, that we can save substrings of the source of any length (as just two pointers) so we can process them later without having to hunt them down again in the source.

Finally, note that we can code up a wide variety of “Move a rider” routines to extract any kind of token from any kind of source. Here, from our compiler, are some…

Examples

Our compiler ignores spaces, tabs, linefeeds, carriage returns, and other noise between meaningful characters. When we find ourselves sitting on a character that doesn’t interest us, we use this routine to move past it:

To move a rider (code rules – noise):
Bump the rider.
If the rider’s source is blank, exit.
If the rider’s source’s first’s target is noise, repeat.

comment, in Plain English, starts with a backslash and ends at the end of a line. When we find ourselves sitting on a comment (ie, the first remaining byte of the rider’s source is a backslash), we suck it up into a token using this routine:

To move a rider (code rules – comment):
Bump the rider.
If the rider’s source is blank, exit.
If the rider’s source’s first’s target is not the return byte, repeat.

remark, in Plain English, is an “inline” comment surrounded by square brackets. When we find ourselves sitting on a remark, we call this guy:

To move a rider (code rules – remark):
If the rider’s source is blank, exit.
If the rider’s source’s first’s target is the return byte, break.
If the rider’s source’s first’s target is the left-bracket byte,
add 1 to a count.

If the rider’s source’s first’s target is the right-bracket byte,
subtract 1 from the count.

Bump the rider.
If the count is 0, break.
Repeat.

Remarks can be nested, so that routine is a little more complex.

When we find ourselves at the beginning of a literal string (ie, the first remaining byte of the source is a double-quote mark), we call this routine to suck the string into a token:

To move a rider (code rules – string):
Bump the rider.
If the rider’s source is blank, exit.
If the rider’s source’s first’s target is the return byte, exit.
If the rider is on any nested double-quote, bump the rider; repeat.
If the rider’s source’s first’s target is the double-quote byte,
bump the rider; exit.

Repeat.

Note that we don’t allow strings to span multiple lines (to avoid common errors), and that we use doubled-up double-quotes in string to allow for double quotes within strings. For example…

“This is a string with the next word “”in”” double quote marks.”

…is interpreted like this:

This is a string with the next word “in” double quote marks.

Qualifiers are used to distinguish special cases of similar routines. In Plain English, they’re enclosed in parentheses. This is the “move a rider” routine that handles qualifiers:

To move a rider (code rules – qualifier):
If the rider’s source is blank, exit.
If the rider’s source’s first’s target is the return byte, break.
If the rider’s source’s first’s target is the left-paren byte,
add 1 to a count.

If the rider’s source’s first’s target is the right-paren byte,
subtract 1 from the count.

Bump the rider.
If the count is 0, break.
Repeat.

Qualifiers can also be nested, so we have to take that into account as we did with remarks.

Punctuation marks in Plain English are all single characters, so we just suck ’em up into the token:

To move a rider (code rules – mark):
Bump the rider.

Possessives typically come at the end of names and can either be an apostrophe followed by the letter “s”, or an apostrophe all by itself, if the preceding letter is “s”. This is the routine that parses possessives:

To move a rider (code rules – possessive):
Bump the rider.
If the rider’s source is blank, exit.
If the rider’s source starts with “s”, bump the rider.

Below is the higher-level routine that calls the above routines, and one more at the end:

To move a rider (code rules):
Position the rider’s token on the rider’s source.
If the rider’s source is blank, exit.
If the rider’s source’s first’s target is noise,
move the rider (code rules – noise); exit.
If the rider’s source’s first’s target is the backslash byte,
move the rider (code rules – comment); exit.
If the rider’s source’s first’s target is the left-bracket byte,
move the rider (code rules – remark); exit.
If the rider’s source’s first’s target is the double-quote byte,
move the rider (code rules – string); exit.
If the rider’s source’s first’s target is the left-paren byte,
move the rider (code rules – qualifier); exit.
If the rider’s source’s first’s target is any mark,
move the rider (code rules – mark); exit.
If the rider is on any possessive,
move the rider (code rules – possessive); exit.
Move the rider (code rules – glom).

glom is any character or collection of characters that can be processed at the next level up — the semantic, rather than the syntactic level. Since noise, comments, remarks, strings, qualifiers, punctuation marks and possessives have been weeded out at this point, the “move a rider” routine for gloms is quite simple:

To move a rider (code rules – glom):
Bump the rider.
If the rider’s source is blank, exit.
If the rider is on any possessive, exit.
If the rider’s source’s first’s target is any glom byte, repeat.

We have to check for possessives a second time in case one pops up at the end of a glom.

Glom bytes are defined as follows:

To decide if a byte is any glom byte:
If the byte is any letter, say yes.
If the byte is any digit, say yes.
If the byte is the tilde byte, say yes.
If the byte is the at-sign byte, say yes.
If the byte is the number-sign byte, say yes.
If the byte is the percent-sign byte, say yes.
If the byte is the ampersand byte, say yes.
If the byte is the underscore byte, say yes.
If the byte is the single-quote byte, say yes.
If the byte is the dash byte, say yes.
If the byte is the cross byte, say yes.
If the byte is the slash byte, say yes.
Say no.

I imagine you get the idea. Using riders in this way, we can simply, flexibly, and quickly parse our source files without having to think about too much at any one time.

Plain English Programming — The Malevolent Mathemagician

A long, long time ago, when I was in seventh grade, a guest speaker came to our math class. We were all very excited to hear him speak, but I was a little sad because my friend Zeno was sent to detention just before the presentation was to begin. Nobody knew why. Anyway, the guest speaker’s name was Mr Georg. He started by asking the class if we thought there were (a) more odd numbers, or (b) more even numbers, or (c) more of both put together. We all said, “More of both put together.”

And it was then that Mr Georg got very red in the face and shouted, “No. No! NO!” Then he turned and started scribbling on the chalk board, mumbling to himself about Hebrew letters the whole time. This, best I can remember, is what he wrote (redrawn in our built-in WYSIWYG page editor):

It seemed like all that writing calmed him down a bit, and he turned back to the class and said, softly but sternly, “I hope you little idiots can now see that you are wrong. The number of even numbers, and the number of odd numbers, and the number of both together are all the same!”

It was then that my deskmate, Leopold (the smartest kid in our class), whispered to me, “I’m not buying it. I think this guy is nuts.” I shushed him because Mr Georg was mumbling and writing on the chalkboard again, and I wanted to hear what he was saying. But Leopold said, “Be careful, friend. I suspect this man is not just a Mathemagician, but a Malevolent Mathemagician, a corrupter of youth.”

This time Mr Georg wrote something like this:

When Mr Georg was finished scribbling, Leopold glanced at the board and then whispered to me, “I don’t know if this charlatan is talking philosophy or theology, but I’m pretty sure there’s no mathematics there.” But now Mr Georg had found a yardstick and was using it to draw really nifty and precise pictures on the board. Something like this, if I remember correctly, which I thought made a lot of sense:

I had just finished copying it down when Leopold whispered, “Ask him to draw the picture for a triangle with both of the short sides just one unit long.” Hoping to get Leopold to stop whispering, I raised my hand and posed the question. But instead of drawing the picture I asked for, Mr Georg erased the board and drew a triangle with the sides labeled a, b, and c. Then he started writing mathemagical formulas on the board as he mumbled names that sounded like Greek to me.

pythagorean 2 corrected

Then he got a stick and tapped on the board as he showed us how the length of the long side of a right triangle was equal to the square root of the sum of the squares of the other two sides, and “proved” that he was right by letting a=3 and b=4 and using his formula to calculate c=5. Then he harrumphed and said, “Now I will answer that little mutt’s question.” So he let a=1 and b=1 and plugged the numbers into his formula. Then he knelt down and started writing the value for c. It was a very long number, and it took him quite a while to calculate it in his head. Sally in the front row asked him where he was getting all those digits and he stopped just long enough to reply, “It’s a technique that is clearly beyond your understanding, little girl. Perhaps you should be in art class.”

Then Leopold leaned over to whisper to me again, but I said, “If you have a question, Leo, ask him, not me.” So he did. Without waiting to be called on, he shouted, “Are you really asking us to believe that the lengths of the sides of a 3-4-5 right triangle are all whole numbers, exact (in some unit of measure), and easily calculated; but that the long side of a right triangle whose other sides are one unit long, can only be represented by a different kind of number altogether? A number that is both inexact and very difficult to compute? Is that what you’re selling here?” Mr. Georg hesitated, and our teacher, to fill the silence, said, “Leopold, you will now join Zeno in detention.” But on the way out Leo turned and shouted back at the class, “The good God created the whole numbers; all else is menschenwerk!”

And that was the day two things happened in my head. First, I began to suspect that there was some shady sleight-of-hand in the whole mathemagical shebang, however popular and useful it appears to be. Second, I began to dream of a day when a different way of understanding problems such as these might be discovered. So I got myself a degree in mathemagics (mainly by keeping my mouth shut)…

…and let the important matters stew in the back of my brain for several decades. I recently discovered that there are others of my ilk, like Master Norman, who wrote this book on the subject:

You can purchase that book here.

But when it came to dealing with trigonometry in our whole-number-only Plain English programming language, I was still looking for something even simpler. I will now describe what steps we’ve taken, which, I admit, are only baby steps toward a more natural and more rational mathematics.

We began by borrowing some ideas from non-mathemagicians, like old-time roofers and ancient explorers. From the roofers we got the idea that angles can be expressed in “rise over run” terms (instead of degrees); and from explorers we got the idea for something more natural than the infamous “unit circle” of the mathemagic world: the compass. This is a picture of our Osmosian compass:

Note that zero is at the top, not the right, that headings increase in the clockwise direction, and that all the way around is 384 points, not 360 degrees. If you’re curious, this is the whole-number-only Plain English routine that draws that image:

To draw the compass: \ note circle illusion in the center
Start fresh.
Center a box 6-1/2 inches by 6-1/2 inches in the work area.
Wipe the box with the tan color (left to right).
Write “X” with the black pen in the middle of the box.
Put 0 into a count.
Loop.
If the user clicks on the choices, break.
Start in the middle of the work area. Move 1/4 inch.
If the count is even, draw a long fancy arrow 1-3/4 inches long with the brown pen.
If the count is odd, draw a short fancy arrow 1 inch long with the black pen.
Turn right 1/16 of the way.
Refresh the screen.
Wait for 10 grains of sand to fall.
Add 1 to the count. If the count is less than 16, repeat.
Start in the center of the box facing north minus 48 points.
Write “000…024…048…072…096…120…144…168…192…216…240…264…288…312…336…360…” with the black pen 2-1/4 inches from the box’s center.
Write “0/0………1/8………1/4………3/8………1/2………5/8………3/4………7/8………” with the brown pen 2-1/2 inches from the box’s center.
Write “.N….NNE…N.E…ENE….E….ESE…S.E…SSE….S….SSW…S.W…WSW….W….WNW…N.W…NNW…” with the black pen 2-3/4 inches from the box’s center.
Refresh the screen.

Now let’s draw some triangles. Here’s a simple 3-4-5 triangle with the center of the screen marked by a red dot…

…and this is the routine that drew it:

To run:
Start up.
Clear the screen to the lightest gray color.
Use the fat black pen.
Start in the center of the screen facing west.
Stroke a line 3 inches long.
Turn right. Stroke another line 4 inches long.
Get a rise/run given the pen’s current spot and the screen’s center.
Stroke a third line given the rise/run.
Draw a dot 1/16 inch wide at the screen’s center with the red color.
Refresh the screen.
Wait for the escape key.
Shut down.

The critical juncture in this routine occurs after we’ve drawn the 3-inch horizontal line and the 4-inch vertical line. At that point we’re sitting on the uppermost vertex of the triangle, facing north. To get back to the center of the screen we need two things. Mathemagicians would say, “Of course you do. You need to know how far to turn around (an angle) and how long your next stroke should be. But we don’t want to say that, for two reasons: first, because it hurts our heads to figure out exactly what angle we need, and secondly because it can be difficult (or even impossible) to figure out the exact stroke length using mathemagical techniques. “If it’s hard, it’s wrong,” is a standing motto among us Osmosians.

So back to the third stroke of our triangle. Exactly where are we? We’re 4 inches north of center (that’s the rise) and three inches west of center (that’s the run). That’s our exact position. In what direction do we want to go? Obviously, we want to go 4 inches south and 3 inches east, by the shortest possible route. And exactly how far do we want to go? Same answer: 4 inches south and 3 inches east. Isn’t it curious that both the angle of our line and the length of our line can be described in the same, whole-number-only terms? And note that this works, not only for “mathemagician-friendly” 3-4-5 triangles, but for all triangles. So all we need to do is compute the rise and the run, which is simply the difference between two spots on the screen…

To get a rise/run given a spot and another spot:
Put the spot minus the other spot into the rise/run.

…and then we stroke the third line based on that rise/run:

Stroke a third line given the rise/run.

At the very bottom we’ve got Bresenham’s integer-only line drawing algorithm, so we’re not cheating when we plot the lines. So far, so good.

Now let’s see if it actually works with that troublesome “unit triangle” — a right triangle with short sides just one unit in length. The routine to draw it is the same as above, except that the first two strokes are only one inch long:

To run:
Start up.
Clear the screen to the lightest gray color.
Use the fat black pen.
Start in the center of the screen facing west.
Stroke a line 1 inches long.
Turn right. Stroke another line 1 inches long.
Get a rise/run given the pen’s current spot and the screen’s center.
Stroke a third line given the rise/run.
Draw a dot 1/16 inch wide at the screen’s center with the red color.
Refresh the screen.
Wait for the escape key.
Shut down.

Here’s the output:

Whoohoo! It works! And what is the exact length of those sides? Let me see… the first side has a rise of exactly 0 and a run of exactly -1; the second side has a rise of exactly 1 and a run of exactly 0. And the third side has has rise of exactly -1 and a run of exactly 1. All integers, all exact, all easily calculated.

But will it work if the triangle is not a right triangle, or is rotated in some arbitrary direction? Let’s see. Here’s a routine that draws eight, scalene triangles at eight different rotations:

To run:
Start up.
Clear the screen to the lightest gray color.
Start in the center of the screen facing west.
Use the fat black pen.
Loop.
Stroke a line 3 inches long.
Turn right 1/8 of the way around.
Stroke another line 2 inches long.
Get a rise/run given the pen’s current spot and the screen’s center.
Stroke a third line given the rise/run.
Turn right 1/4 of the way around.
Add 1 to a count. If the count is 8, break.
Repeat.
Draw a dot 1/16 inch wide on the screen’s center with the red pen.
Refresh the screen.
Wait for the escape key.
Shut down.

And here’s the output:

Baby steps toward a more natural, more rational mathematics. BIG baby steps. In Plain English.

Plain English Programming — Nested IFs

This is a picture of Sharon, the Mother of all Osmosians:

Her favorite saying is, “Just tell us what you need, sonny, and we’ll show you how to live without it.” She insisted, in fact, that we use nothing but black dots of different sizes to show you what she looks like.

Another of her favorite sayings is about nested IFs. She says, “Two deep is too deep, boys. No nesting.”

Now everyone knows that “If Momma ain’t happy, ain’t nobody happy,” so when we developed our Plain English compiler we intentionally left out nested IFs. Turns out she was right, as usual — they’re not necessary. Search through the 25,000 Plain English sentences that comprise our system — unique desktop, simplified file manager, elegant text editor, handy hexadecimal dumper, native-code-generating compiler/linker, and WYSIWYG document editor — and you won’t find a single nested IF. Nada. Zip. Zilch. No “elses” either.

An Example

So how does one live without nested IFs? Let’s consider an example given by R S Abhishek, a Research Associate at Ati Motors that popped up when I asked Google for a “real life nested IF statement”:


if(age < 60){
    if(income <= 250000){
        tax_percent = 0
    }elseif(income >= 250001 && income <= 500000){
        tax_percent = 0.1
    }elseif(income >= 500001 && income <= 1000000){
        tax_percent = 0.2
    }else{
        tax_percent = 0.3
    }
}elseif(age >= 60 && age < 80){
    if(income <= 300000){
        tax_percent = 0
    }elseif(income >= 300001 && income <= 500000){
        tax_percent = 0.1
    }elseif(income >= 500001 && income <= 1000000){
        tax_percent = 0.2
    }else{
        tax_percent = 0.3
    }
}else{
    if(income <= 500000){
        tax_percent = 0
    }elseif(income >= 500001 && income <= 1000000){
        tax_percent = 0.2
    }else{
        tax_percent = 0.3

Twenty-seven lines there, with lots of indention, highlighted keywords, and too many squiggly braces for me to count. Now Let’s consider the non-nested, Plain English equivalent:

To get a tax rate for an age and an income:
If the age is less than 60, get the tax rate for young people with the income; exit.
If the age is between 60 and 79, get the tax rate for old folks with the income; exit.
If the income is less than or equal to 500000, put 0 into the tax rate, exit.
If the income is between 500001 and 500000, put 2/1000 into the tax rate; exit.
Put 3/1000 into the tax rate.

To get a tax rate for young people given an income:
If the income is less than or equal to 250000, put 0 into the tax rate, exit.
If the income is between 250001 and 500000, put 1/1000 into the tax rate; exit.
If the income is between 500001 and 1000000, put 2/1000 into the tax rate; exit.
Put 3/1000 into the tax rate.

To get a tax rate for old folks given an income:
If the income is less than or equal to 300000, put 0 into the tax rate, exit.
If the income is between 300001 and 500000, put 1/1000 into the tax rate; exit.
If the income is between 500001 and 1000000, put 2/1000 into the tax rate; exit.
Put 3/1000 into the tax rate.

Just eighteen lines (including the optional blanks between the routines), and a mere handful of punctuation marks — all used in the usual ways.

The trick, you see, is to properly factor the problem by handling (and thus eliminating) special cases at the top, exiting after each. The normal/default/fall-through case then appears, unconditioned, at the bottom.

Some notes

If you’re wondering whether “between” in Plain English is inclusive or exclusive, just do what we did. Head down to the local Walmart and ask the folks coming and going to “Pick a number between 1 and 10.” You’ll find that lots of people choose 1 and 10, which shows that the normal interpretation of “between” is inclusive.

And if you’re wondering why we put “3/1000” into the tax rate (instead of 0.3, like the other guy), it’s because Plain English is a whole-number only language. Why? Because our Osmosian Mom used to put us to sleep with stories from an ancient Osmosian adventure book entitled, The Epic Battle for the Soul of Mathematics: Kronecker vs Cantor. I remember, in fact, this painting hanging over my bed:

But that’s really a whole ‘nother story. It will have to wait for another article. Suffice it to say, at this juncture, that Mom was right about nested IFs — you don’t need ’em.

Kobayashi Maru Primes

It has been said that “Great engineering strikes a balance between competing objectives.” I believe this to be true, in both mechanical and software engineering. In the latter, the competing objectives are typically clarity, size, and speed.

So I thought it a great opportunity to apply this principle when a computer scientist in South America challenged me to write a Plain English program, based on the Sieve of Eratosthenes, that could count the number of primes less than 250,000 in less than a second (on a bottom-of-the-line computer from Walmart).

Now Plain English is not the fastest language on earth, because clarity trumps speed when the primary goal of a language is to be natural. But Plain English is a reasonably fast language, and by balancing competing objectives, we can usually find an acceptable solution to any problem laid before us.

In this case, we first needed to make the famous Sieve of Eratosthenes clear; easy to understand. So we started with Wikipedia’s description of the algorithm…

To find all the prime numbers less than or equal to a given integer n by Eratosthenes’ method:
1. Create a list of consecutive integers from 2 through n: (2, 3, 4, …, n).
2. Initially, let p equal 2, the smallest prime number.
3. Enumerate the multiples of p by counting to n from 2p in increments of p, and mark them in the list (these will be 2p, 3p, 4p, …; the p itself should not be marked).
4. Find the first number greater than p in the list that is not marked. If there is no such number, stop. Otherwise, let p now equal this new number (which is the next prime), and repeat from step 3.

…which in Plain English reads like this:

To make a list of prime numbers less than or equal to a number:
Create the list of consecutive integers from 2 to the number. \ wiki’s #1
Get an entry from the list. \ wiki’s #2
Loop. Mark higher multiples of the entry. \ wiki’s #3
Get the entry for the next lowest possible prime. If the entry is not nil, repeat. \ wiki’s #4

That takes care of the clarity objective. If you’re wondering, the type definitions and support routines that make that actually work are equally clear:

An entry is a thing with a number and a non-prime flag.
A list is some entries.

To create a list of consecutive integers from a number to another number:
Privatize the number.
Loop.
If the number is greater than the other number, exit.
Create an entry for the number.
Append the entry to the list.
Add 1 to the number.
Repeat.

To create an entry for a number:
Allocate memory for the entry.
Put the number into the entry’s number.
Clear the entry’s non-prime flag.

To mark higher multiples of an entry:
Privatize the entry.
Loop.
Put the entry’s next into the entry.
If the entry is nil, exit.
If the entry’s number is evenly divisible by the original entry’s number,
set the entry’s non-prime flag.
Repeat.

To get an entry for the next lowest possible prime:
Put the entry’s next into the entry.
If the entry is nil, exit.
If the entry’s non-prime flag is set, repeat.

So clarity, good. Size, good (the executable is only 150k). But what about speed? A little over 4 minutes to make the whole list for numbers between 1 and 250,000. Not good. Hmm… What would Captain Kirk do? What if we sacrificed a little size for speed? Why, after all, do we keep calculating primes over and over again when they never change? So I ran the program again, this time with an additional routine like this…

To make a prime string from a list:
Put “N” into the prime string.
Loop.
Get an entry from the list.
If the entry is nil, exit.
If the entry’s non-prime flag is set, append “N” to the prime string; repeat.
Append “Y” to the prime string.
Repeat.

…to make a string with all the primes marked. Then I saved the string in a text file and pasted it into a library I called “Super fast prime number checker for numbers between 1 and 250,000.” This is what that library looks like:

The prime string is a string equal to “NYYNYNYNNNYNYN…”

To decide if a number is prime (fast check):
If the number is less than 1, say no.
If the number is greater than the prime string’s length, say no.
Put the prime string’s first into a byte pointer.
Add the number to the byte pointer.
Subtract 1 from the byte pointer.
If the byte pointer’s target is the big-Y byte, say yes.
Say no.

The prime string in the source is, of course, much longer than the one shown above. And it could be 8 times shorter if we used bits instead of “Y”s to mark the primes. But it hurts my head to have to think that hard. At any rate, this program…

To run:
Start up.
Write “Working…” on the console.
Start a timer.
Get a count of prime numbers less than or equal to 250000.
Stop the timer.
Write the count then ” prime numbers.” on the console.
Write the timer’s string then ” milliseconds.” on the console.
Wait for the escape key.
Shut down.

To get a count of prime numbers less than or equal to a number:
Privatize the number.
Clear the count.
Loop.
If the number is prime (fast check), add 1 to the count.
Subtract 1 from the number.
If the number is less than 2, break.
Repeat.

…which is very clear, and reasonably small (about 400k), is also remarkably fast. It can count the 22,044 primes less than or equal to 250,000 in 16 milliseconds or less. And, since it’s (indirectly) based on the Sieve of Eratosthenes, it meets the requirements of the original specification!

I think Captain Kirk would approve.

Plain English Programming — Smoothing Polygons

This is how we define a polygon in Plain English:

A polygon is a thing with some vertices.

And this is how we define a vertex:

A vertex is a thing with an x coord, a y coord, and a spot at the x.

The part that says “and a spot at the x” overlays the vertex’s x and y coordinates with a spot, just for convenience.

Now this is a page I whipped up in Plain English’s built-in WYSIWYG page editor to describe how we smooth polygons:

And these are the Plain English sentences we use to actually do the job:

To smooth a polygon:
If the polygon is nil, exit.
If the polygon’s vertices’ count is less than 3, exit.
If the polygon is closed,
append the polygon’s first vertex’s next’s spot to the polygon; set a flag.
Put the polygon’s first vertex into a left vertex.
Loop.
If the left vertex’s next is nil, break.
Put the left vertex’s next into a right vertex.
Get a center spot given the left vertex’s spot and the right vertex’s spot.
Insert the center into the polygon after the left vertex.
Put the left vertex’s next into a new vertex.
If the left vertex’s previous is nil, put the right vertex into the left vertex; repeat.
Get another center spot given the left vertex’s previous’ spot and the new vertex’s spot.
Get a difference between the other center and the left vertex’s spot.
Divide the difference by 2.
Add the difference to the left vertex’s spot.
Put the right vertex into the left vertex.
Repeat.
If the flag is not set, exit.
Destroy the polygon’s first vertex given the polygon.
Destroy the polygon’s last vertex given the polygon.

It’s a little more complicated than the picturesque explanation because it has to deal with both open and closed polygons, and with left over vertices when the total number of vertices isn’t evenly divisible by three.

Here are some sample polygons, shown left-to-right (a) in their original state, (b) smoothed once, (c) smoothed twice, and (d) smoothed three times:

The first example shows that you can put a square peg in a round hole, if you smooth it up first. The red line in the final example shows how smoothing can be used to fit a curve to an irregular dataset.

And that, folks, is…

Whoops! I think that looks more natural smoothed:

Thanks for reading. I hope things go “smoothly” for you in the future.

A Simple Merge Sort

The only compound data types native to Osmosian Plain English are records and doubly-linked lists. When we need to sort a list, we use the simple recursive merge sort that I’ll show you below. But first we need something to sort. Let’s sort fruits, and let’s begin with a type definition:

A fruit is a thing with a name.

When the word “thing” appears in a type definition, our compiler works a little magic behind the scenes to make things (pun intended) more powerful and flexible. The above definition, for example, actually causes the following data types to be defined:

So a Fruit is really nothing but a pointer containing the address of a Fruit Record.

And each 16-byte Fruit Record has a hidden 8-byte prefix with two pointers for linking these records into lists, together with the fruit’s name, which is a string. Plain English strings are stored in the Heap and can be any length. So the Name in the Fruit Record is actually just two pointers to the first and last bytes of the string on the Heap, respectively. String memory is managed automatically, but thing memory is managed by the programmer.

The third type generated by the compiler serves as the anchor for lists of Fruit Records. Such lists are simply (and intuitively) called Fruits, the plural of Fruit.

Now let’s add some fruits to a list, in random order, and sort them. Here are the top level sentences in our test program:

To run:
Start up.
Create some fruits.
Write the fruits on the console.
Skip a line on the console.
Sort the fruits.
Write the fruits on the console.
Destroy the fruits.
Wait for the escape key.
Shut down.

And here are the routines that will be called to “Create some fruits”:

To create some fruits:
Add “banana” to the fruits.
Add “apple” to the fruits.
Add “orange” to the fruits.
Add “bacon” to the fruits.
Add “pineapple” to the fruits.
Add “pomegranate” to the fruits.
Add “tomato” to the fruits.
Add “grape” to the fruits.
Add “fig” to the fruits.
Add “date” to the fruits.

To add a name to some fruits:
Allocate memory for a fruit.
Put the name into the fruit’s name.
Append the fruit to the fruits.

Now we’re ready to sort. This is the sort routine:

To sort some fruits:
If the fruits’ first is the fruits’ last, exit.
Split the fruits into some left fruits and some right fruits.
Sort the left fruits.
Sort the right fruits.
Loop.
Put the left fruits’ first into a left fruit.
Put the right fruits’ first into a right fruit.
If the left fruit is nil, append the right fruits to the fruits; exit.
If the right fruit is nil, append the left fruits to the fruits; exit.
If the left fruit’s name is greater than the right fruit’s name,
move the right fruit from the right fruits to the fruits; repeat.
Move the left fruit from the left fruits to the fruits.
Repeat.

When we run this program, the output on the console looks like this:

But is it fast? Let’s see using this modified test program:

To run:
Start up.
Write “Working…” on the console.
Put 10000 into a count.
Create some fruits using “apple” and the count.
Start a timer. Sort the fruits. Stop the timer.
Write the timer then ” milliseconds for ” then the count on the console.
Destroy the fruits.
Put 100000 into the count.
Create the fruits using “apple” and the count.
Start the timer. Sort the fruits. Stop the timer.
Write the timer then ” milliseconds for ” then the count on the console.
Destroy the fruits.
Put 1000000 into the count.
Create the fruits using “apple” and the count.
Start the timer. Sort the fruits. Stop the timer.
Write the timer then ” milliseconds for ” then the count on the console.
Destroy the fruits.
Wait for the escape key.
Shut down.

The fruits this time, at the start, look like this:

apple 0010000
apple 0009999
apple 0009998

And the output on the console looks like this:

Not quite linear, I admit. But not exponentially bad, either. Ten times as many records take roughly ten times as long to sort. There’s a technical way of saying this using big “O’s” and little “n’s’ and “logs” and stuff, but Plain English programmers don’t generally think that way. And it’s stable, as a Plain English programmer would expect — records with duplicate sort values retain their original sequence.

Good, simple, useful stuff.

Musings on the “A” in “AI”

A while back I wrote a program that could draw simple landscapes.

Version 1

The first version was entirely deterministic: I knew exactly what shape the horizon would take, where the sun would appear, how many birds would adorn the sky, etc. It produced acceptable drawings, but was too predictable to be interesting. Just a machine.

Version 2

The next version was entirely random in its workings: I let the program decide what to draw and where to draw it, and really had no idea what it would produce. Almost every drawing it rendered was tasteless nonsense. Fast and prolific, but no artist. A broken machine.

Version 3: Vincent

The third version was a combination of the two — deterministic enough to stay within reasonable bounds (horizon somewhere near the middle of the page, no more than three birds at time) yet free enough to produce original works that I could not predict, even though I wrote every line of the code. Most of the time this version performs reasonably well, and now and then it draws something so striking that I print it off and hang it on the wall. I call this third version, Vincent.

Here is a sample of Vincent’s work:

Inside Vincent’s Head

Here are some of the Plain English sentences that constitute Vincent’s soul. First, some type definitions:

A landscape is a thing with an horizon, a sun, and some birds.

An horizon is a polygon.
A sun is a polygon.
A bird is a polygon.

Then a global variable so Vincent can remember what he’s drawn:

The drawings are some landscapes.

And now, his primary talent:

To draw a landscape:
If you’re tired, say “I’d rather not, I’m tired”; exit.
Say “Okay”.
Imagine the landscape.
Render the landscape.
Remember the landscape.

The “imagining” phase, as any human artist knows, is the critical part. This is how I taught Vincent to imagine a landscape:

To imagine a landscape:
Allocate memory for the landscape.
Imagine an horizon in the landscape.
Imagine a sun in the landscape.
Imagine some birds in the landscape.

The horizon comes first:

To imagine an horizon in a landscape:
Allocate memory for the landscape’s horizon.
Put the screen’s left-center into a spot.
Move the spot 1 inch up or down.
Add the spot to the landscape’s horizon.
Loop.
Move the spot 1/2 inch to the right and 1/4 inch or so up or down.
Add the spot to the landscape’s horizon.
If the spot is not on the screen, break.
Repeat.
Smooth the landscape’s horizon 2 times.

Here comes the sun:

To imagine a sun in a landscape:
Allocate memory for the landscape’s sun.
Start with “A1 A9 I9 I1 A1” for the landscape’s sun.
Smooth the landscape’s sun 3 times.
Pick a spot anywhere above the landscape’s horizon.
Scale the landscape’s sun given the spot and the landscape’s horizon.
Center the landscape’s sun on the spot.

The sun is actually just a square rounded off. The scaling makes it smaller the further it is from the horizon:

To scale a sun given a spot and an horizon:
Put 1 inch plus the spot’s y into a ratio’s numerator.
Put the horizon’s top into the ratio’s denominator.
Reduce the ratio.
Scale the sun to the ratio.

And last of all, the birds:

To imagine some birds in a landscape:
Pick a number between 1 and 3.
Say “I’ve decided to draw ” then the number then ” birds this time” and wait.
Loop.
If the number is 0, exit.
Imagine a bird in the landscape.
Add the bird to the landscape’s birds.
Subtract 1 from the number.
Repeat.

To imagine a bird in a landscape:
Allocate memory for the bird.
Start with “E1 D3 G5 E7 G9” for the bird.
If you feel like it, flip the bird left to right.
Randomly scale the bird between 10 and 25 percent.
Smooth the bird.
Pick a spot for the bird in the landscape.
Center the bird on the spot.

Once Vincent has a landscape “in mind,” so to speak, the rendering of it is easy:

To render a landscape:
If the landscape is nil, exit.
Fill the screen with the tan color.
Render the landscape’s horizon with the black color.
Put masking tape below the landscape’s horizon.
Render the landscape’s sun with the black color.
Render the landscape’s birds with the black color.
Take the masking tape off.

The “masking tape” is used to make sure the sun appears behind the horizon.

Committing a landscape to memory is a trivial thing for Vincent:

To remember a landscape:
Append the landscape to the drawings.

The Musings

Playing with Vincent tends to make me philosophical about things like will, memory, consciousness, emotions and understanding. My thoughts generally run along these lines:

• Vincent makes decisions on his own. What the horizon will look like, where the sun will be placed, and how many birds will appear are unknown until he decides. Does he have a will of his own?

• Vincent can tell us, when asked, what he has done. “I’ve drawn 7 landscapes today,” for example. Does he remember?

• Vincent is aware of what it he is doing: “I’ve decided to draw 3 birds this time.” Is he conscious?

• Vincent gets weary: under specific conditions, he refuses to draw, saying “I’d rather not, I’m tired.” Does he have emotions?

• Vincent responds, properly, to various commands. When asked to draw, for example, he draws. When asked what he’s done, he responds verbally, with appropriate remarks. Does he understand?

• One version of Vincent had a strong instinct for self-preservation. When I hit the quit button, he said, “I don’t want to die. Do that again and I’ll make a thousand copies of myself on your disk.” He would, and he did. But he won’t again.

My conclusions?

I believe that Vincent’s capabilities are congruent, but not equivalent, to the corresponding capabilities in human beings. They are implemented differently, for one thing. His will is less free but also less fickle than ours. His memory is less capacious but more exacting. His consciousness is more narrowly focused, but less easily distracted. And his moods and understanding are not as deep or rich as ours, but they are significantly more predictable.

I also believe that his attributes and ours are not on the same inclined plane, where differences are mere matters of degree. More code will never make Vincent a real person. But I do believe that Vincent’s capabilities and ours are on different steps of the same staircase, and that it is therefore appropriate to use words like will, memory, consciousness, emotion, and understanding to describe them. And that we can learn things about ourselves by studying creatures like Vincent. For example:

• Vincent has both a hardware “body” and a software “soul.” The two can be easily distinguished, and even separated. And the same soul can be reanimated in a different body.

• Vincent did not “evolve” via a long series of random mutations and natural selections; he was designed and created by a being greater than he. I cannot prove that all animate beings come to life through a similar creative process, but I can say that in every case where I have been able to discover, first hand, the exact origins of such things, purposeful design has been involved.

• Vincent has little or nothing to be proud of. Whatever talents and skills he possesses were graciously bestowed upon him by his creator. Now and then he may surprise me with a particularly striking drawing based on his own decisions, but he wouldn’t be making those decisions at all were it not for me.

Bottom line: Vincent is an AI, but not an Artificial Intelligence; he’s nothing more or less than an Apparent Intelligence. As all his kind will always be.

A WYSIWYG Document Editor

When my elder son and I finished writing our Plain English compiler, we decided to test its usefulness by adding a what-you-see-is-what-you-get document editor that we could then use to document our system. Two birds with one stone!

Document View

We call this facility the Writer. This is what our instruction manual looks like when you open it in the Writer:

We call this Document View: one line per page. Whole pages (and groups of pages, contiguous or not) can be selected, copied, cut, pasted, duplicated and printed in this view. They can also be saved in Adobe PDF format so folks without the Writer can read them.

Page View

When you open a page, you see that page exactly as it will appear when it is printed (or saved as a PDF page), albeit with sky-blue grid lines to aid in tasteful layout. This is how page 8 of our instruction manual appears on the screen:

In this view, whole pages can be enlarged, reduced, rotated, and spell-checked. And various text and graphic “shapes” can be added, deleted, moved, sized, colored, flipped, mirrored, rotated, copied, cut, pasted, duplicated, grouped, etc. The Home, End, Page Up, and Page Down keys can be used to conveniently flip through the pages, without returning to Document View.

Externalized Pages

Documents (and parts of documents) can be saved, as mentioned above, as PDFs. But the native format for permanent storage is much simpler, and is text only. Consider, for example, the document below, which has just one page with four shapes on it: a pink ellipse, a green triangle, a blue square, and a text box with “ABC” in it:

If you use our “Open as Text” command (or any other text editor) to open this document, this is what you’ll see:

ream cal-3024
page 15840 12240 1 1440
ellipse 0 0 0 0 1000 875 1440 1440 2880 2880
polygon 0 0 0 1500 1000 875 4 4320 1440 5760 2880 4320 2880 4320 1440
rectangle 0 0 0 2100 1000 875 7200 1440 8640 2880 0
text 0 0 0 -1 0 0 10080 1440 14400 2880 0 “title” “osmosian” 1440 “center” 0 0 0 yes
“ABC” end end end

One entry for the whole document, one for each page, and one for each shape on the page. And not a single “<” in sight!

It would be too much to paste the 4,000 Plain English sentences that define the whole Writer here. They are included in the source code that comes with our system www.osmosian.com/cal-4700.zip. For now, let’s settle for a sample routine:

To group any selected shapes on a page:
If the page is nil, exit.
Create a group shape.
Put “group” into the group shape’s kind.
Put the page’s scale into the group shape’s scale.
Move the page’s shapes to some original shapes.
Loop.
Put the original shapes’ first into a shape.
If the shape is nil, break.
Remove the shape from the original shapes.
If the shape is not selected, append the shape to the page’s shapes; repeat.
Deselect the shape.
Append the shape to the group shape’s shapes.
Repeat.
Append the group shape to the page’s shapes.
Select the group shape.
Adjust the group shape.

Shapes on pages are drawn back-to-front, so the newly grouped shapes will appear on top of the other shapes on the page.

Not a Toy

Please keep in mind that this is facility is not a “toy.” We used it, as I mentioned above, to write the documentation for our system. And since then it’s been used to produce an 800-page illustrated “teach your kid to read” course that you can see here: www.rhymingreader.com. Not to mention several other books for children, numerous training manuals, and presentation materials of all kinds, large and small. This is one of my all-time favorite pages, developed by a grade school teacher in an attempt to settle an age-old question:

QED.

Robotics

Kids (and adults) love robotics. And now, by combining control boards made by these folks…

https://www.pc-control.co.uk/

…with the free Osmosian Plain English programming language, kids (and adults) can program their robotic creations in a language they already know: English.

My 12-year-old son and I thought that automating this LEGO maze…

…would be a good test of the system. So we assembled the LEGO maze base as instructed. The knob on the front tilts the maze left and right; the knob on the side tilts the maze forward and back.

We then bought a control board kit from the PC-Control folks that came with battery pack, some servos, and a USB cable:

We built a LEGO sub-base to hold the battery pack and the control board, and we mounted the servos so they would mate with the knobs on the LEGO base:

Then we used the built-in Osmosian wysiwyg page editor to plan our maze pattern…

…and built the top layer of the maze to match (give or take some decorative trees and buildings):

It was then time to program. We started with a few type defintions:

A setting is a number.

A knob has a setting.

The front knob is a knob.
The side knob is a knob.

Then we added in the low-level helper routines we needed to talk to the well-documented Dynamic Link Library (DLL) provided by the PC-Control folks:

To start up the Hawk servo board:
Call “hawk.dll” “Sys_Initialise” returning a number.

To set the servos:
Call “hawk.dll” “Servo_SetServos” with 1
and the front knob’s setting and the side knob’s setting
and 0 and 0 and 0 and 0 and 0 and 0 returning a number.

To shut down the Hawk servo board:
Call “hawk.dll” “Sys_CloseAllDevices” returning a number.

Then we stuck in some mid-level helpers, to get us closer to where we wanted to be:

To center a knob:
Put 512 into the knob’s setting.
Set the servos.

To turn a knob to the left:
Put 712 into the knob’s setting.
Set the servos.

To turn a knob to the right:
Put 312 into the knob’s setting.
Set the servos.

And finally, we added the high-level routines that would serve as our official Application Programming Interface (API):

To center both knobs:
Center the front knob.
Center the side knob.

To tilt the board forward and right:
Turn the side knob to the right. Wait for 1/10 second.
Turn the front knob to the right. Wait for 1 second.

To tilt the board forward and left:
Turn the side knob to the right. Wait for 1/10 second.
Turn the front knob to the left. Wait for 1 second.

To tilt the board backward and right:
Turn the side knob to the left. Wait for 1/10 second.
Turn the front knob to the right. Wait for 1 second.

To tilt the board backward and left:
Turn the side knob to the left. Wait for 1/10 second.
Turn the front knob to the left. Wait for 1 second.

To tilt the board left and forward:
Turn the front knob to the left. Wait for 1/10 second.
Turn the side knob to the right. Wait for 1 second.

To tilt the board left and backward:
Turn the front knob to the left. Wait for 1/10 second.
Turn the side knob to the left. Wait for 1 second.

To tilt the board right and forward:
Turn the front knob to the right. Wait for 1/10 second.
Turn the side knob to the right. Wait for 1 second.

To tilt the board right and backward:
Turn the front knob to the right. Wait for 1/10 second.
Turn the side knob to the left. Wait for 1 second.

It was then easy to write the application, since all we had to say was WHAT we wanted the maze to do, rather than HOW to do it:

To do the lego maze:
Start fresh.
Start up the hawk servo board.
Center both knobs.
Write and say “MAKE SURE THE BOARD IS LEVEL, THEN PRESS ENTER”.
Wait for the enter key.
Tilt the board backward and right.
Write and say “PUT THE BALL ON THE GREEN SQUARE, THEN PRESS ENTER”.
Wait for the enter key.
Tilt the board forward and right.
Write and say “THIS IS FUN”.
Tilt the board left and forward.
Write and say “UNDER THE BRIDGE”.
Tilt the board backward and right.
Tilt the board left and backward.
Tilt the board forward and right.
Tilt the board left and forward.
Tilt the board backward and left.
Write and say “ABOUT HALF-WAY, I THINK”.
Tilt the board right and forward.
Tilt the board backward and right.
Tilt the board left and backward.
Tilt the board forward and left.
Tilt the board right and backward.
Tilt the board forward and right.
Tilt the board left and backward.
Write and say “THROUGH THE RIVER”.
Tilt the board forward and left.
Tilt the board right and backward.
Tilt the board forward and right.
Tilt the board left and forward.
Write and say “ALMOST THERE”.
Tilt the board backward and left.
Shut down the hawk servo board.
Write and say “ALL DONE”.
Write and say “COOL”.

The output on the screen, when the program is run, looks like this:

The words are spoken as they are displayed on the screen.

And the happy (and confident) aspiring engineer looks like this:

Simple, fast, flexible. Good clean stuff. Good clean fun.

Plain English Programming — Is a Picture Worth 1000 Words?

It’s been said that a picture is worth a thousand words. Let’s find out.

We start with a picture of a famous person. In this case, I chose a photo of the famous athiest Richard Dawkins:

Then using this type definition…

A block is a thing with a box and a brightness.

…and this routine…

To create a list of brightness blocks from a picture:
Center the picture on the screen.
Draw the picture.
Put the picture’s left-top into a spot.
Loop.
Allocate memory for a block. Append the block to the list.
Put the spot and the spot plus 12 pixels into the block’s box.
Put the block’s average brightness into the block’s brightness.
Add 12 pixels to the spot’s left. If the spot’s left is less than the picture’s right, repeat.
Put the picture’s left into the spot’s left.
Add 12 pixels to the spot’s top. If the spot’s top is less than the picture’s bottom, repeat.

…I divided the photo into 12 pixel by 12 pixel blocks, calculated the average brightness of each block, and saved the blocks on a list. This is the function-style routine that calculates the average brightness for each block:

To put a block’s average brightness into a brightness:
Put the block’s left-top into a spot.
Loop.
Get a color given the spot.
Add the color’s brightness to a total brightness. Add 1 to a count.
Add 1 pixel to the spot’s left. If the spot is in the block’s box, repeat.
Put the block’s left into the spot’s left.
Add 1 pixel to the spot’s top. If the spot is in the block’s box, repeat.
Put the total divided by the count into the brightness.

At this point, at least in my mind, the photo now looked something like this (imaginary grids in my head are always sky blue):

Then I picked a bold, monospaced font that had uppercase letters approximately 12 pixels square, and chose an appropriately ironic sentence (with the spaces removed so the resulting picture would have a uniform “texture”). Finally, I drew the sentence over and over, one letter in each block in the shade of gray indicated by the block’s brightness. This is the routine:

To draw a list of brightness blocks given a string and a font:
Get a letter from the string (wrapping at the end).
Get a block from the list.
If the block is nil, break.
Put 0 and 0 and the block’s brightness into a color.
Draw the letter in the center of the block’s box with the color and the font.
Repeat.
Refresh the screen.

And this is the result I got on the screen:

The picture is 8 inches square. Plain English uses 96 pixels per inch, and our blocks are 12 pixels square, so there are 64 blocks (or letters) per square inch; 4096 in all. The average length of a word in English is 5 letters, so it looks like, in this case, a picture is only worth about 819 words!

This is the entire program in case you want to type it in yourself and run it using our Plain English development system (www.osmosian.com/cal-4700.zip) with any picture and string of your choice:

A block is a thing with a box and a brightness.
A list is some blocks.

To run:
Start up.
Fetch a picture from “c:\g4g articles\1000 words\dawkins.png”.
Create a list of brightness blocks from the picture.
Clear the screen.
Put “courier new bold” and 1/4 inch into a font.
Draw the list of brightness blocks using “INTHEBEGINNINGGODCREATEDTHEHEAVENSANDTHEEARTH” and the font.
Wait for the escape key.
Destroy the picture.
Destroy the list.
Shut down.

To draw a list of brightness blocks given a string and a font:
Get a letter from the string (wrapping at the end).
Get a block from the list.
If the block is nil, break.
Put 0 and 0 and the block’s brightness into a color.
Draw the letter in the center of the block’s box with the color and the font.
Repeat.
Refresh the screen.

The byte pointer is a byte pointer.

To get a letter from a string (wrapping at the end):
If the byte pointer is not nil, add 1 to the byte pointer.
If the byte pointer is greater than the string’s last
put the string’s first into the byte pointer.
If the byte pointer is nil, put the string’s first into the byte pointer.
Put the byte pointer’s target into the letter.

To draw a letter in the center of a box with a color and a font:
Put the letter into a string.
Draw the string in the box with the color and the font and “center”.

To create a list of brightness blocks from a picture:
Center the picture on the screen.
Draw the picture.
Put the picture’s left-top into a spot.
Loop.
Allocate memory for a block. Append the block to the list.
Put the spot and the spot plus 12 pixels into the block’s box.
Put the block’s average brightness into the block’s brightness.
Add 12 pixels to the spot’s left. If the spot’s left is less than the picture’s right, repeat.
Put the picture’s left into the spot’s left.
Add 12 pixels to the spot’s top. If the spot’s top is less than the picture’s bottom, repeat.

To put a block’s average brightness into a brightness:
Put the block’s left-top into a spot.
Loop.
Get a color given the spot.
Add the color’s brightness to a total brightness. Add 1 to a count.
Add 1 pixel to the spot’s left. If the spot is in the block’s box, repeat.
Put the block’s left into the spot’s left.
Add 1 pixel to the spot’s top. If the spot is in the block’s box, repeat.
Put the total divided by the count into the brightness.

To fetch a picture from a path:
Read the path into the picture.
Resize the picture to 8 inches by 8 inches.

If you prefer a different language, just think of the above as pseudo-code.

Fractal Forests

A fractal is a shape made up of progressively smaller versions of the same shape. A simple tree, for example, can be drawn by connecting progressively smaller “Y” shapes to each other, like so:

Real life trees, however, are rarely so regular. To make a more realistic tree, we need to vary the width and length of the branches. And the angles between the branches, as well. It also helps if we color the lines representing the trunk and branches brown, and the smaller lines that represent the leaves in greenish hues. Here are some Plain English sentences that do the job:

To draw a forest tree given a size:
If the size is less than 1/32 inch, exit.
Put the size divided by 1/4 inch into the pen size.
If the size is less than 1/4 inch, pick a greenish color.
Remember where we are.
Pick a number between 1 and 3.
Draw a line using the size divided by the number for the length.
Pick a ratio between 1/32 and 1/24.
Turn left the ratio. Draw another forest tree given the size times 2/3. Turn right the ratio.
Turn right the ratio. Draw a third forest tree given the size times 2/3. Turn left the ratio.
Go back to where we were.

When we run the above routine, we get something along these lines (pun intended):

And if we add a little housekeeping and a loop, like this…

To run:
Start up.
Draw a fractal forest.
Wait for the escape key.
Shut down.

To draw a fractal forest:
Erase the screen using the tan color.
Loop.
Start within 3 inches of the screen’s bottom line.
Pick a size between 3 and 6 inches.
Pick a brownish color.
Draw a forest tree with the size.
Add 1 to a count. If the count is 32, break.
Repeat.
Refresh the screen.

…we can draw a whole forest, like this one:

Ta da!

A Solution to the Fatal Flaw in Relational Database Systems

Okay, folks, true story.

Way back in the late 1970’s I was working as a technical programmer in the database group at Kmart Corporation’s world headquarters. IBM’s IMS was the mainframe database of choice in those days. But after reading Dr. Edgar F. Codd’s seminal paper, A Relational Model of Data for Large Shared Data Banks, I was convinced there was a better way.

So over the next couple of years I developed a database design methodology called Extended Relational Analysis, and in 1980 I started Relational Systems Corporation to promote it. I had close contacts with the Oracle folks back then (when Oracle employed only six programmers), and I used to demonstrate the virtues of the relational approach in my classes using Oracle via a 300-baud dial-up connection to a VAX-11/780 located in Canada. The folks at General Motors were impressed enough to welcome the Oracle folks into their data centers, and both Oracle and General Motors (and Ford, Boeing, Teradata, EDS, and a number of other big companies) thanked me for my efforts by purchasing licenses to use my training materials. The salad days. Lots of fun, lots of money.

Twenty-nine years later, in 2009, Relational Systems Corporation went bankrupt. Seems I was too busy teaching and doing research to notice that I was spending myself into a hole that I couldn’t dig myself out of. Fortunately, it was only money that was lost. The fruits of those fecund decades survive to this day.

Here’s what happened. We started out running our business with a mishmash of applications on Macintosh computers. As we grew, two things appeared obvious: (1) we needed a better and more tightly integrated system, and (2) 90% of the desktop computers in use were now Windows machines. So some of my associates and I decided to convert all of our Macintosh stuff (programs and data) to something better on Windows. And then came the surprise (which I report to my shame). When we tried to design a system for our own house — using the techniques we had been so successful at selling to others — we found both the tools and the resulting system to be exceptionally cumbersome and, in the end, altogether untenable.

We had a lot of different kinds of data, you see. The usual customer files, employee records, accounting and payroll sheets, of course; but we also had training materials, advertising brochures, and class schedules, together with student registration forms, confirmations, and evaluations; not to mention maps to our classroom and signs for our walls. Now some of those things could be easily stored and maintained in table format, but much of it just didn’t fit. So the fatal flaw that we discovered is that tables are good for many things, but when you try to get flowers to grow in tables that are not native to that soil, you end up spending way to much time and energy converting the information back and forth from it’s normalized storage form to a form the user actually wants to see and use. After all, an entry form on a screen is not the same thing as a normalized set of tables, and most summary reports don’t look like tables, either. Besides, SQL is hardly the weapon of choice when one sits down to tackle a new set of illustrated training materials.

Fortunately, I came across a book by a Russian computer scientist, Mikhail M. Gilula, who was also looking for ways to improve on Dr. Codd’s remarkable work. The book was called The Set Model for Database and Information Systems, and this then-obscure Russian showed me how a table can hold, not just one kind of row, but many kinds of rows at the same time. And it was then that it dawned on me that what I was looking for wasn’t a database, but a pagebase: a collection of Gilula-style sets, but WYSIWYG, with all the virtues of the relational model (like simplicity and closure), and none of the shortfalls. Talk about collusion with the Ruskies! Quick, somebody call CNN!

So my elder son, another associate, and I sat down with Delphi Pascal version 2 and a Windows 95 machine to make this pagebase dream a reality. We wanted tables to become folders, rows to become pages, and columns to become named shapes (ie, fields) on our pages. Ala Gilula, we wanted to allow different kinds of pages in each folder. And to maintain relational-style closure (where each operation is “tables in, tables out”) we wanted each of the operations of our built-in programming language to be “folders in, folders out.”

25,000 lines of code later, it was done. And just two weeks after that, our entire business was up and running on it. We called the program Perspective, and we still use it today, without modification, some 20 years later. If you’re wondering exactly what a pagebase looks like, take a look at the Perspective User Manual. Everything users and programmers need to know in just 104 pages! The manual was written and illustrated entirely in Perspective, and thus is just another folder (table) full of pages (rows) in our pagebase.

This is me, then and now…

…and I don’t mind telling you that the only thing I regret is not buying Oracle stock.

PS. We never got around to converting our ERA materials to Perspective, but here’s a link to our popular SQL Training Manual, written entirely in Perspective: each page a “row,” with the whole folder a “table” called SQL Training Manual. Try to do that with nothing but a relational database!